Configuring the components
-
In the design workspace, double-click the tRowGenerator to open its
editor.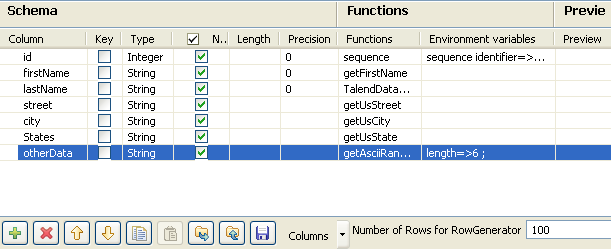
-
Click seven times on the [+] button to add seven columns to the
schema. Name them id,
firstName,
lastName,
street,
city,
States and
otherData,
respectively. -
In the Type column,
select Integer for
id and String for all other fields.In the Functions
columns, select the function you want to
apply to each column in the schema.Click OK to validate
the configuration and close the editor.A pop-up window opens and asks you to propagate the
changes. Click Yes. -
In the design workspace, double-click tWriteDynamicFields
component to display its Basic
settings view.Click the […]
button next to Edit
schema to set the schema of the
component.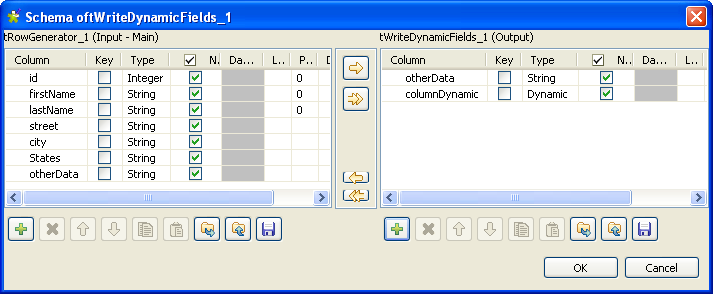
-
In the schema editor, click on
otherData column, then click
to add the column on the output
side.This way, the column will be displayed in the output,
but it will not be included into the dynamic
column. -
Click the [+] button
in the output area to add a column.Name it columnDynamic and set
its Type to
Dynamic.Warning:The dynamic column must be defined
in the last row of the schema.Warning:The column names must be exactly the
same on both sides of the editor, otherwise the
output columns will not be
recognised. -
Click OK to validate
your changes and close the editor.Warning:The dynamic schema
feature is only supported in Built-In mode.All columns that are not in the output area in the
editor will be included into the dynamic
column. -
In the design workspace, double-click the first
tLogRow to
display its Basic
settings view.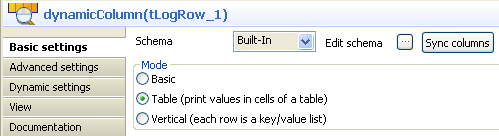 In the Mode area,
select the Table (print value
in cells of a table) option. -
In the design workspace, double-click tWriteDynamicFields
component to display ots Basic
settings view.Click the […]
button next to Edit
schema.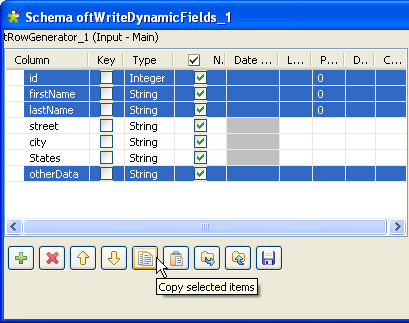
-
Select in the left area the columns you want to add to
the tExtractDynamicFields schema and click
the
button to copy them.
Click OK to close the
editor. -
In the design workspace, double-click the tExtractDynamicFields
component to display its Basic
settings view.Click the […]
button next to Edit
schema.In the schema editor, click the
button in the output area to
paste the columns copied from tWriteDynamicFields component.In the input area, click the Dynamic column and click
thebutton to add the dynamic
column to the output schema.Click OK to validate
your changes and close the editor. -
In the design workspace, double-click the second
tLogRow to
display its Basic
settings view.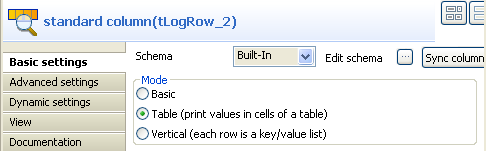
-
In the Mode area,
select Table (print value in
cells of a table) option.