|
Component Family |
Routing |
|
|
Function |
cWireTap wiretaps messages to a |
|
|
Purpose |
cWireTap is used to route messages |
|
|
Basic settings |
URI |
The endpoint URI to send the wire tapped message. |
|
|
Populate new exchange |
Select this check box to populate a new message to the wiretap URI. |
|
|
Populate Type |
This option appears when the Populate new |
|
|
Expression: Using expression Language: Select the language of Expression TXT: Enter the expression to set the |
|
| Processor: Using processor gives you full power to specify how the exchange is populated as you can set properties, headers and so on to the message with a piece of Java code in the Code field. |
||
| Copy the original message |
Select this check box to create a copy of the original exchange, which The exchange |
|
|
Usage |
cWireTap can be a middle |
|
|
Limitation |
n/a |
|
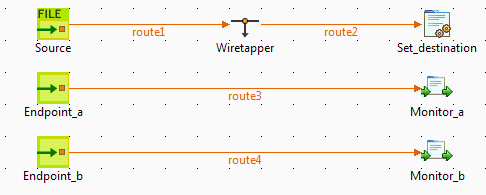
In this scenario, a cWireTap component is used to route a
message to a separate endpoint while it is routed to the ultimate destination.
-
From the Palette, expand the Messaging folder, and drop a cFile and two cMessagingEndpoint components onto the design
workspace. -
Expand the Routing folder, and drop a
cWireTap component onto the design
workspace. -
Expand the Processor folder, and drop a
cJavaDSLProcessor and two cProcessor components onto the design
workspace. -
Right-click the cFile component, select
Row > Route from the contextual menu and click the cWireTap component. -
Repeat this operation to connect the components as shown above.
-
Label the components to better identify their functionality.
-
Double-click the cFile component labeled
Source to display its Basic
settings view in the Component tab.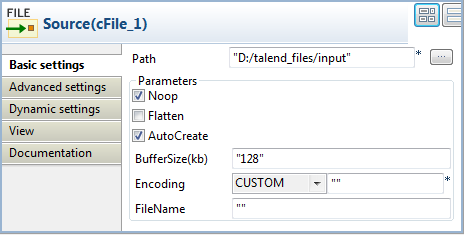
-
In the Path field, browse to or enter the
input file path. In this use case, there is a Hello.txt
file in the specified file path, which contains the content Hello
World!. Leave the other parameters as they are. -
Double-click the cWireTap component to
display its Basic settings view in the
Component tab.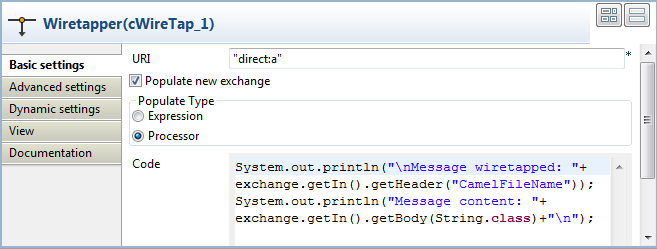
-
Enter
"direct:a"in the URI field to route the wiretapped message to this endpoint.Select the Populate new exchange check box, select Processor as the populate type, and then enter the following code in the Code box to display the file name of the wiretapped message and its content on the console:
123456System.out.println("Message wiretapped: "+exchange.getIn().getHeader("CamelFileName"));System.out.println("Message content: "+exchange.getIn().getBody(String.class)+""); -
Double-click the cJavaDSLProcessor
component to display its Basic settings
view in the Component tab.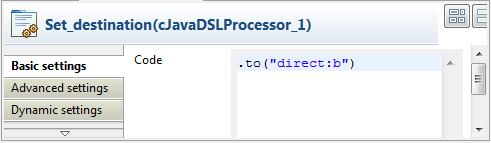
-
In the Code field, enter the Java code
.to("direct:b")to define the URI of the endpoint to route
the original message to. -
Double-click the cMessagingEndpoint component labeled Endpoint_a to display its Basic settings view in the Component tab. Enter
"direct:a"in the URI field to retrieve the message routed to this endpoint.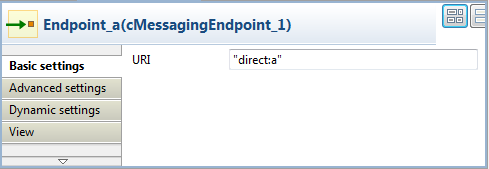
Repeat this operation to set the endpoint URI for Endpoint_b.
-
Double-click the cProcessor component labeled Monitor_a to display its Basic settings view in the Component tab. Enter the following code in the Code box to display the file name of the message routed to Endpoint_a.
12System.out.println("Message on endpoint a: "+exchange.getIn().getHeader("CamelFileName"));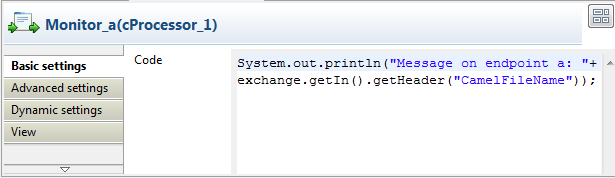
Then, configure the other cProcessor component in the same way to display the file name of the message routed to Endpoint_b.
-
Press Ctrl+S to save your Route.
-
Click the Code tab at the bottom of the
design workspace to have a look at the generated code.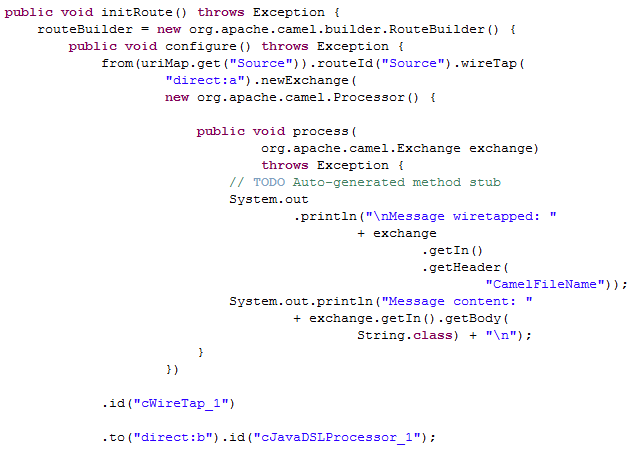
In this partially shown code, any message
fromthe endpoint
Sourcewill be wiretapped by.wireTapand
routed to"direct:a". The fine name and content of each
wiretapped message will be displayed on the console. The original message
will be routed.toan endpoint identified by the URI
"direct:b", which is defined in
cJavaDSLProcessor_1. -
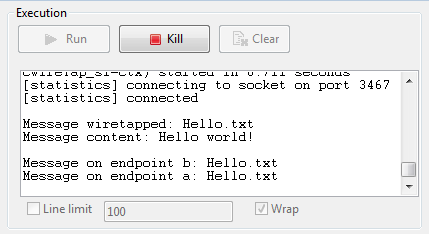
Click the Run view to display it and click the Run button to launch the execution of your Route.
You can also press F6 to execute it.RESULT: The source message is wiretapped and routed to endpoint a as well as being routed to endpoint b.