|
Component Family |
Context |
|
|
Function |
cConfig manipulates the |
|
|
Purpose |
cConfig allows you to set the |
|
|
Basic settings |
Imports |
Enter the Java code that helps to import, if necessary, external |
| Code |
Write a piece of code to manipulate the CamelContext. |
|
| Dependencies | Select the library or libraries that is required by the CamelContext or Typeconverter Registry from the list. |
|
|
Usage |
cConfig cannot be added directly in a Route. |
|
|
Limitation |
n/a |
|
In this scenario, an instance of dataset is added in the Registry and implemented by a
cMessagingEndpoint component.
-
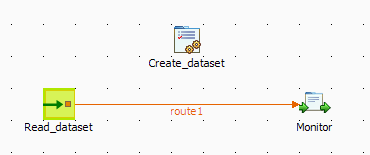
From the Palette, expand the Context folder, and drop a cConfig component onto the design workspace.
-
Expand the Messaging folder, and drop a cMessagingEndpoint component onto the design
workspace. -
Expand the Processor folder, and drop a cProcessor component onto the design
workspace. -
Right-click the input cMessagingEndpoint component,
select Row > Route from the contextual menu and click the cProcessor component. -
Label the components to better identify their functionality.
-
Double-click the cConfig component, which is labelled
Create_dataset, to display its
Basic settings view in the Component tab. and set its parameters.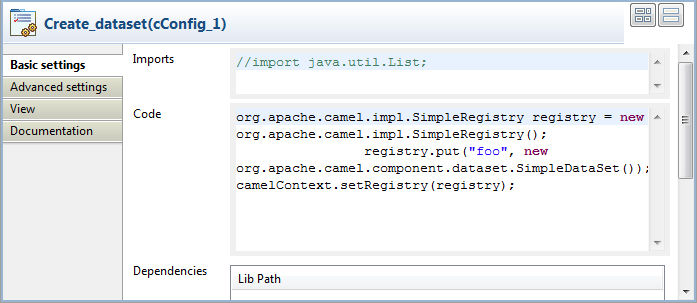
-
Write a piece of code in the Code field
to register the dataset instance foo into
the registry, as shown below.12345org.apache.camel.impl.SimpleRegistry registry = neworg.apache.camel.impl.SimpleRegistry();registry.put("foo", neworg.apache.camel.component.dataset.SimpleDataSet());camelContext.setRegistry(registry); -
Double-click the input cMessagingEndpoint
component, which is labelled Read_dataset, to display its Basic
settings view in the Component tab.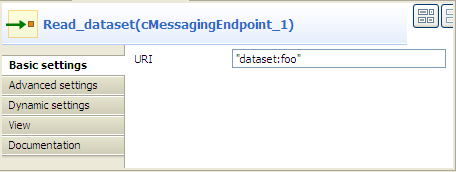
-
In the URI field, enter
dataset:foo between the quotation marks. -
Double-click the cProcessor component,
which is labelled Monitor, to display its
Basic settings view in the Component tab.
-
In the Code box, customize the code as
follows so that the Run console displays
the message contents:12System.out.println("Message content: "+exchange.getIn().toString()); -
Press Ctrl+S to save your route.
-
Click the Code tab at the bottom of the
design workspace to have a look at the generated code.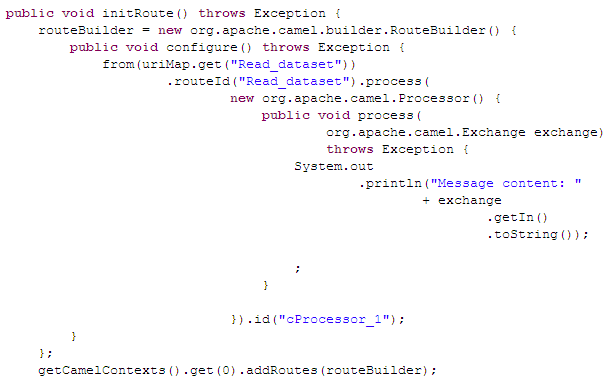
As shown in the code, a message route is built
fromthe endpoint identified
byRead_datasetandcProcessor_1gets the
message content and displays it on the console. -
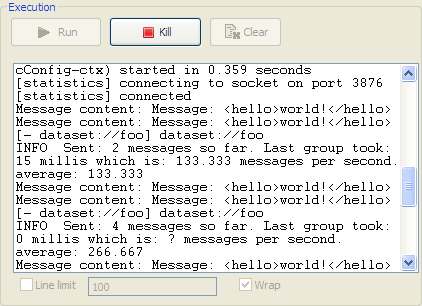
Click the Run view to display it and
click the Run button to launch the
execution of your route. You can also press F6 to execute it.RESULT: The message content is printed in the console.