|
Component Family |
Messaging |
|
|
Function |
cCXF provides integration with |
|
|
Purpose |
cCXF is used to provide or consume |
|
|
Basic settings |
Service/Address |
The service endpoint URL where the Web service is provided. In case cCXF is used to consume a |
|
|
Service/Type |
Select which type you want to use to provide Web service. Either wsdlURL: Select this type to serviceClass: Select this type to |
|
|
Service/WSDL File |
This field appears when the wsdlURL service type is selected. If the WSDL file |
|
Service/Service configuration |
This option appears when wsdlURL The WSDL field in the wizard is
After setting the WSDL file, click |
|
|
|
Service/Service Class |
This field appears when the serviceClass service type is selected. Enter the |
|
|
Service/Dataformat |
The exchange data style. POJO, POJOs (Plain Old Java Objects) PAYLOAD is the message payload, RAW is the raw message that is CXF_MESSAGE is the raw message |
| Service Name | The service name this service is implementing. It maps to the wsdl:service@name in the format ofns:SERVICE_NAME where ns is a namespaceprefix valid at this scope. This field gets filled in automatically upon completion of the Service configuration. |
|
| Port Name | The endpoint name this service is implementing. It maps to the wsdl:port@name, in the format ofns:PORT_NAME where ns is a namespaceprefix valid at this scope. This field gets filled in automatically upon completion of the Service configuration. |
|
|
Operation Name |
The operation name this service is implementing. It maps to the |
|
|
Use Service Registry |
This option is only available if you subscribed to Talend Enterprise Select this check box to enable the service registry. It provides When the cCXF component is used When the cCXF component is used In the Correlation Value field, In the Username and the Password fields, enter the authentication If SAML token is registered in the service registry, you need to For more information about how to set up and use the Service |
|
| Use Service Locator |
Provides service consumers with a mechanism to discover service NoteFor service consumers, the URL additionally needs to be set to The Custom Properties table |
|
| Use Service Activity Monitor |
Captures events and stores this information to facilitate in-depth This feature is not supported when MESSAGE is used as the processing mode. When This option is also disabled when the Use |
|
| Use Authentication |
Select this check box to enable the authentication option. Select When the cCXF component is used When the cCXF component is used When SAML Token (ESB runtime –: Enter the username and the Propagate using U/P: Enter the Propagate using Certificate: This check box disappears when the Use |
|
|
Use Authorization |
This option is only available if you subscribed to Talend Enterprise When the cCXF component is used When the cCXF component is used For more information about the management of user roles and |
|
|
Use Business Correlation |
Select this check box to enable the correlation option so that When cCXF is used to provide a cCXF will extract the correlation If the request message does not contain a correlation ID, the When cCXF is used to consume a You can specify a correlation ID in the Correlation Value field using a string or a simple This check box disappears when the Use |
|
| Advanced settings | Arguments | Set the optional arguments in the corresponding table. Click [+] as many times as required to add arguments to the table. Then click the corresponding Value field and enter a value. See the site http://camel.apache.org/cxf.html for available URI options. |
|
Usage |
cCXF can be a start, middle or |
|
|
Limitation |
Due to the license incompatibility, one or more JAR files required to use this component are Multiple cCXF components with When cCXF is used to consume a For simple proxy use cases, for example, from cCXF to cProcessor to cCXF, When cCXF is used to consume a |
|

In this scenario, a Web service is produced by a cCXF
component using a WSDL file.
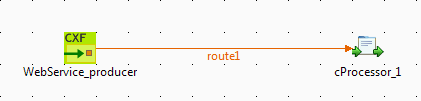
This use case requires one cCXF component and one
cProcessor component.
-
From the Palette, expand the Messaging folder, and drop a cCXF component onto the design workspace.
-
Expand the Processor folder, and drop a cProcessor component onto the design
workspace. -
Right-click the cCXF component, select Row > Route from
the contextual menu and click the cProcessor component. -
Label the cCXF component for better
identification of its functionality.
In this scenario, the cProcessor component is used only to
enable the cCXF component to function as a service
producer. Therefore, it does not need any configuration.
-
Double-click the cCXF component to
display its Basic settings view in the
Component tab.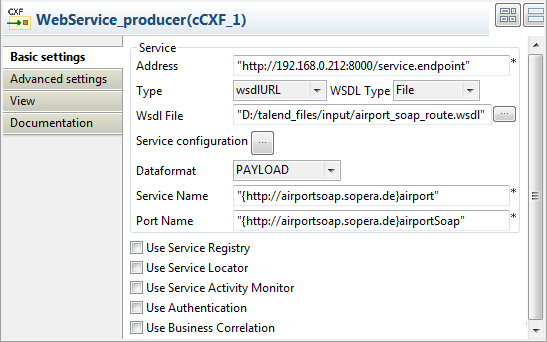
-
In the Address field, type in the service
endpoint URL for the Web service to be provided, http://192.168.0.212:8000/service.endpoint in this
example. -
From the Type list, select wsdlURL to enable producing the Web service from
a WSDL file. -
In the Wsdl File field, browse to or type
in the path to the WSDL file to be used. -
Click […] next to Service Configuration to open the service configuration
wizard. The WSDL field has been filled in
with the selected WSDL file. Click to show the available port in the Port Name box. Select the
 airportSoapport and
click Finish to close the wizard. The
Service Name and Port Name fields in the Basic
settings view are filled in automatically.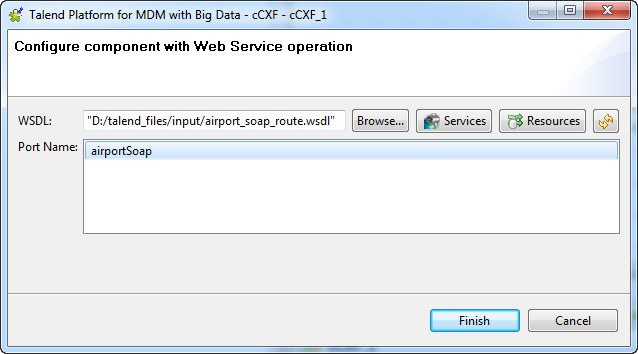
-
From the Dataformat list, select
PAYLOAD mode for the wsdlURL data format. -
Press Ctrl+S to save your route.
-
Click the Code tab at the bottom of the
design workspace to have a look at the generated code.
As shown in the code, the cCXF component
labelledWebService_producerproduces the Web service from an
input fileairport_soap_route.wsdlusing the endpoint URL
http://192.168.0.212:8000/service.endpoint. -
Click the Run view to display it and
click the Run button to launch the
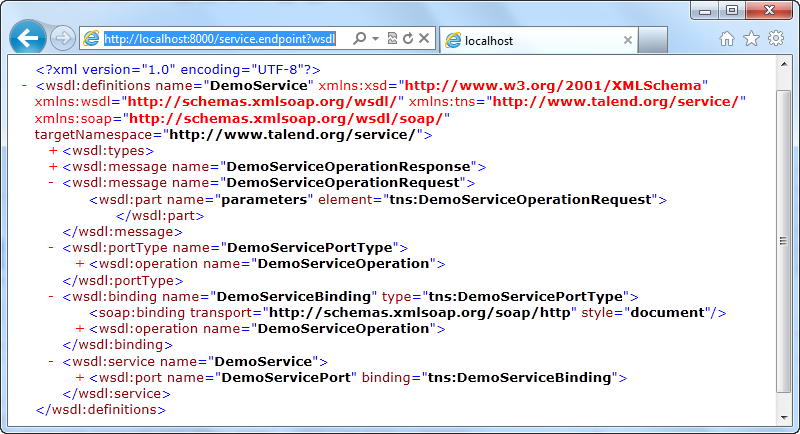
execution of your Route. You can also press F6 to execute it.RESULT: The service is successfully started. You can access it from a Web
browser using the service endpoint URL followed by?wsdl.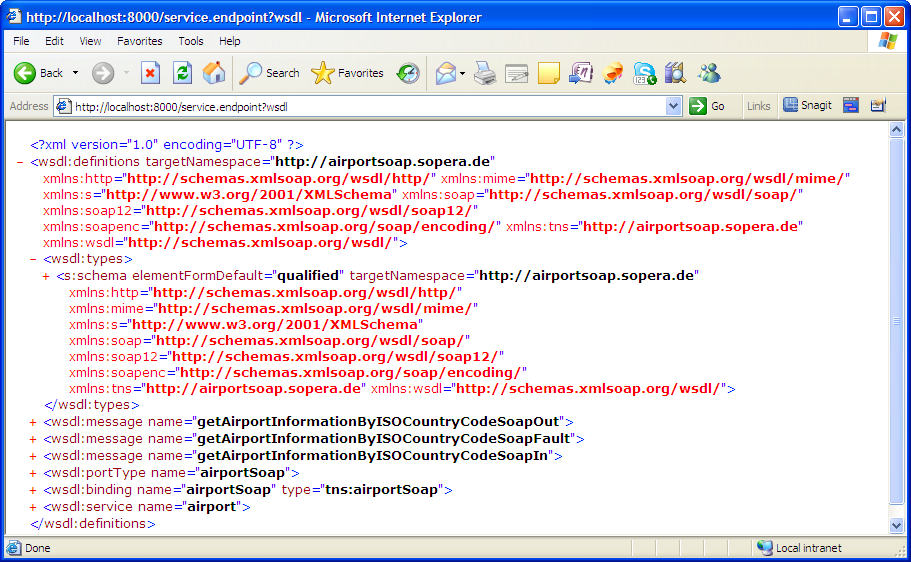
In this scenario, a Web service is provided from a Java class file using a cCXF component.
-
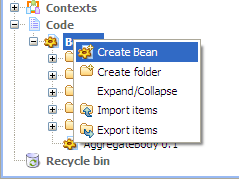
From the repository tree view, expand the Code node and right click the Beans node. In the contextual menu, select Create Bean.
-
The [New Bean] wizard opens. In the Name field, type in a name for the bean, for
example, CXFdemobean. Click Finish to close the wizard.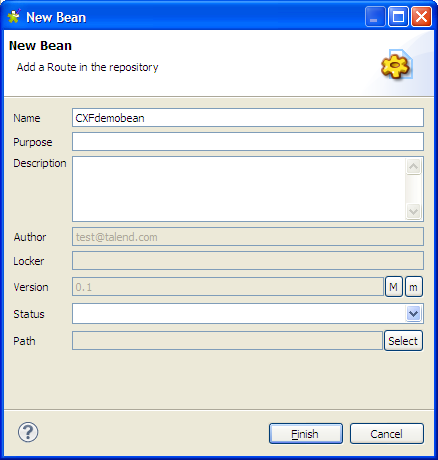
-
Change the class type to
interface, change the return type
tostringand remove the message body.12345package beans;public interface CXFdemobean {public String helloExample(String message) ;} -
Press Ctrl+S to save your bean.
This use case requires one cCXF
component and one cProcessor component.
-
From the Palette, expand the Messaging folder, select the cCXF component and drop it onto the design
workspace. -
Expand the Processor folder, select the
cProcessor component and drop it onto
the design workspace. -
Right-click the cCXF component, select
Row > Route in the contextual menu and click the cProcessor component. -
Label the components for better identification of their
functionality.
In this scenario, the cProcessor component is used only to
enable the cCXF component to function as a service
producer. Therefore, it does not need any configuration.
-
Double-click the cCXF component to
display its Basic settings view in the
Component tab.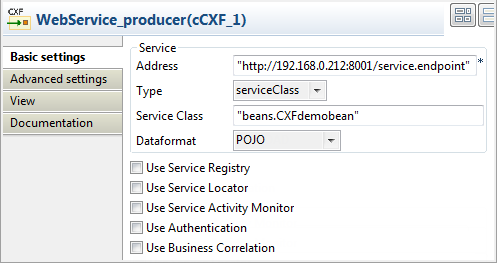
-
In the Address field, type in the service
endpoint URL for the Web service to be provided, http://192.168.0.212:8001/service.endpoint in this
example. -
From the Type from, select serviceClass to start the Web service from a Java
class. -
In the Service Class field, specify the
predefined bean class, CXFdemobean in
this example. -
From the Dataformat list, select
POJO as the serviceClass service data format. -
Press Ctrl+S to save your Route.
-
Click the Code tab at the bottom of the
design workspace to have a look at the generated code.
As shown in the code, the cCXF component labelled
WebService_producerproduces the Web service from an
predefined beanbeans.CXFdemobeanusing the endpoint URL
http://192.168.0.212:8001/service.endpoint. -
Click the Run view to display it and
click the Run button to launch the
execution of your Route. You can also press F6 to execute it.RESULT: The service is successfully started. You can access it from a Web
browser using the service endpoint URL followed by?wsdl.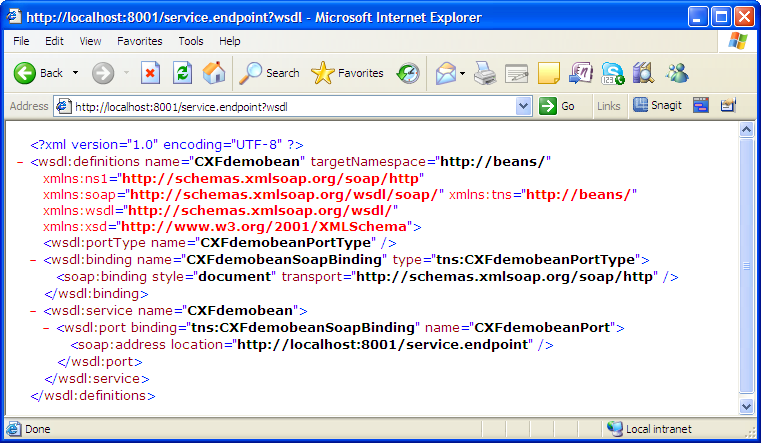
In this scenario, a Web service is provided from a Route Resource using a cCXF component.
-
From the Repository tree view, right-click the
Resources node and select Create Resource from the context menu.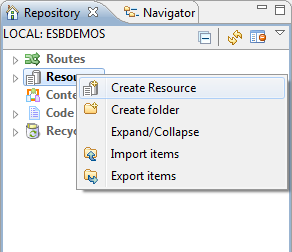
-
The [New Route Resource] wizard opens. In the Name field, type in a name for the Resource, for
example, DemoServiceWsdl. Click Finish to close the wizard.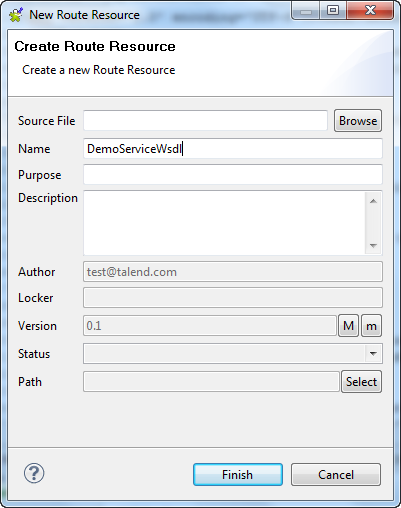
-
Browse to an existing WSDL file from the local file system and click Finish.
-
Press Ctrl+S to save your Route Resource.
This use case requires a cCXF and a
cProcessor component.
-
From the Palette, expand the Messaging folder, and drop a cCXF component onto the design workspace.
-
Expand the Processor folder, and drop a
cProcessor component onto the design
workspace. -
Right-click the cCXF component, select
Row > Route from the contextual menu and click the cProcessor component. -
Label the cCXF component for better
identification of its functionality.
In this scenario, the cProcessor component is
used only to enable the cCXF component to function
as a service producer. Therefore, it does not need any configuration.
-
Double-click the cCXF component to
display its Basic settings view in the
Component tab.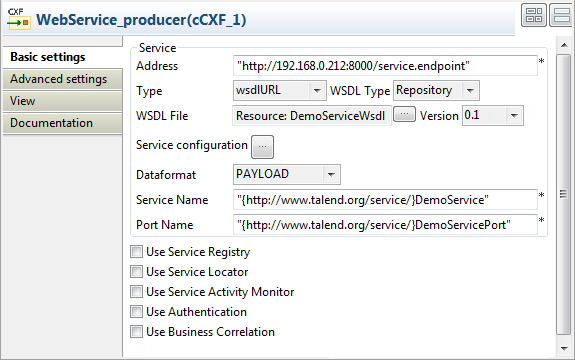
-
In the Address field, type in the service
endpoint URL for the Web service to be provided, http://localhost:8000/service.endpoint in this
example. -
From the Type list, select wsdlURl and use the Repository property type to start the Web service from the
Route Resource that we have created. -
In the WSDL File field, click the
[…] button and select DemoServiceWsdl from the Resources tree view.
Click OK to close the wizard. -
Click […] next to Service Configuration to open the service configuration
wizard. The WSDL field has been filled in
with the selected WSDL file. Click to show the available port in the Port Name box. Select the DemoServicePortport
and click Finish to close the wizard. The
Service Name and Port Name fields in the Basic
settings view are filled in automatically.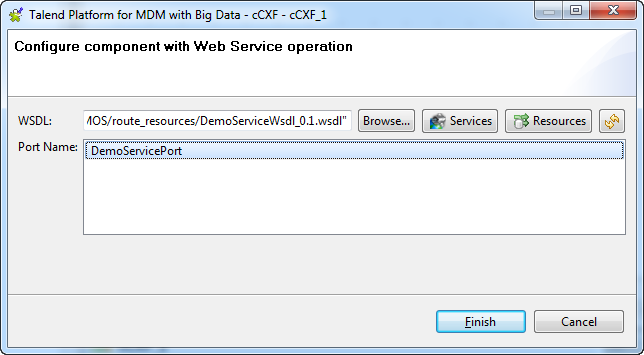
-
Press Ctrl+S to save your Route.
-
Click the Code tab at the bottom of the
design workspace to have a look at the generated code.
As shown in the code, the cCXF component labelled
WebService_producerproduces the Web service from an
predefined Route ResourceDemoServiceWsdlusing the endpoint
URLhttp://localhost:8000/service.endpoint. -
Click the Run view to display it and
click the Run button to launch the
execution of your Route. You can also press F6 to execute it.RESULT: The service is successfully started. You can access it from a Web
browser using the service endpoint URL followed by?wsdl.