
|
Component Family |
Processor |
|
|
Function |
cTalendJob calls a Data |
|
|
Purpose |
cTalendJob allows you to exchange |
|
|
Basic settings |
Repository |
Select this option to call a Job from the Repository. |
| External | Select this option to call a Job that is exported as an OSGI Bundle For ESB. |
|
| Repository/Use Selected Context |
This field appears when Repository is selected. Select this check box to use the context that is selected in the Context list when executing the Job. |
|
| Repository/Use Route Context |
This field appears when Repository is selected. Select this check box to use NoteIf context does not exist in the Job, null values of the |
|
| Repository/Use Job Context | This field appears when Repository is selected. Select this check box to use the selected context on the Job side when executing the Job. |
|
| Repository/Job |
This field appears when Repository is selected. Click […] to show the [Assign WarningWhen assigning an existing Job to cTalendJob, only the Jobs with the tRouteInput component can be You can double click cTalendJob |
|
| Repository/Version | This field appears when Repository is selected. Select the version of the Job if more than one version of the Job is available. |
|
| Repository/Context |
This field appears when Repository is selected. Select from the list the WarningThis option works only when Use Selected |
|
|
External Jar/Library |
This field appears when External |
|
|
|
External Jar/Job |
This field appears when External |
|
|
External Jar/Context |
This field appears when External |
| Context Param |
Use this table to change the variable values of the specified Click [+] to add as many rows as |
|
| Advanced settings | Propagate Header | Select this check box to pass the message header to the referenced Job as a context variable. |
|
Usage |
cTalendJob can be a start, middle |
|
|
Limitation |
n/a |
|
In this scenario, we will build a Data Integration Job with context in the Integration perspective first. Then, we will create a Route in
the Mediation perspective with a cTalendJob component to call the Job and set the context variables in
the Job.
In this section, we will build a Job named RouteCommunication
to accept the message from a Route. For more information on how to build a Job, see
Talend Studio User Guide.
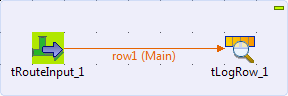
-
Drag and drop a tRouteInput and a
tLogRow from the Palette onto the design workspace. -
Right-click the tRouteInput
component, select Row > Main from the contextual menu and click the
tLogRow component.
-
Create two variables,
headerandbodyin the
Defaultcontext group. Give the value
worldto thebodyvariable. The
headervariable will receive its value propagated from
the Route. For more information about context setup, see
Talend Studio User Guide.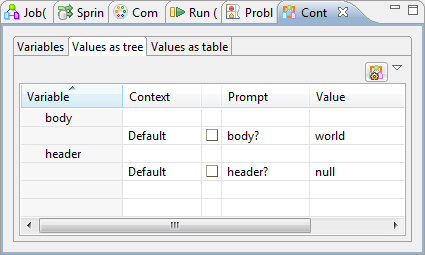
-
Double-click the tRouteInput
component to open its Basic settings
view in the Component tab.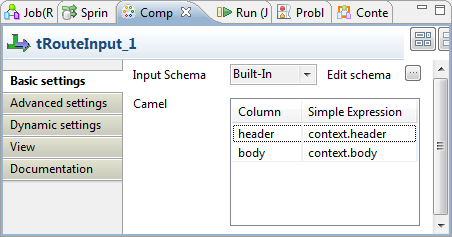
-
Click […] next to Edit Schema. In the schema dialog box, click
[+] to add two lines of String type and name themheader
andbodyrespectively. Click OK to close the dialog box.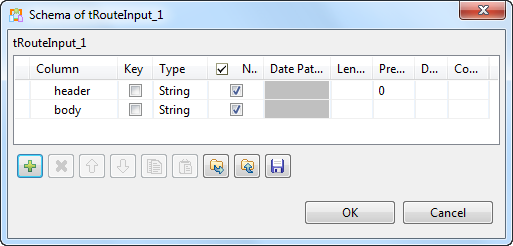
-
In the Simple Expression field for
theheaderelement, entercontext.headerto
use the variableheaderin the context group which will be
propagated from the Route.In the same field for the
bodyelement, enter
context.bodyto use the variablebodyin
the context group as the message body. -
The tLogRow component will monitor
the message exchanges and does not need any configuration. -
Press Ctrl+S to save your Job.
In this section, we will switch to the Mediation
perspective and create a Route to send a message to the Job.
-
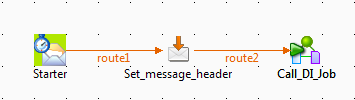
Drag and drop a cTimer, a cSetHeader, and a cTalendJob from the Palette onto the design workspace.
-
Link the components with the Row >
Route connection as shown
above. -
Label the components for better identification of their roles.
-
Double-click the cTimer component to
open its Basic settings view in the
Component tab.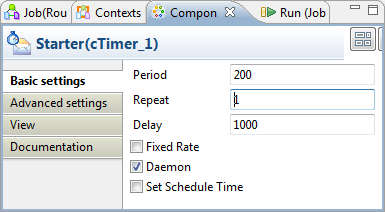
-
Set the values for the Period
(200), Repeat (1) and
Delay (1000) fields as shown above to trigger a message
exchange after a delay of 1000 milliseconds. -
Double-click the cSetHeader component
to display its Basic settings view in
the Component tab.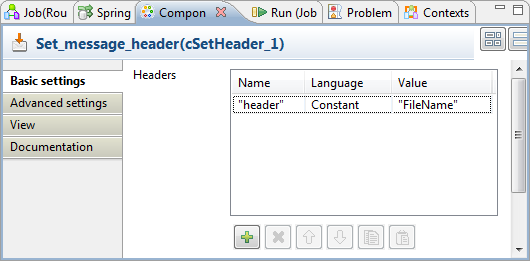
-
Click [+] to add a row to the
Headers table.In the Name field, type in
"header"as the header name.Select Constant in the Language list, and enter
"FileName"in the Value field. -
Double-click the cTalendJob component
to display its Basic settings view in
the Component tab.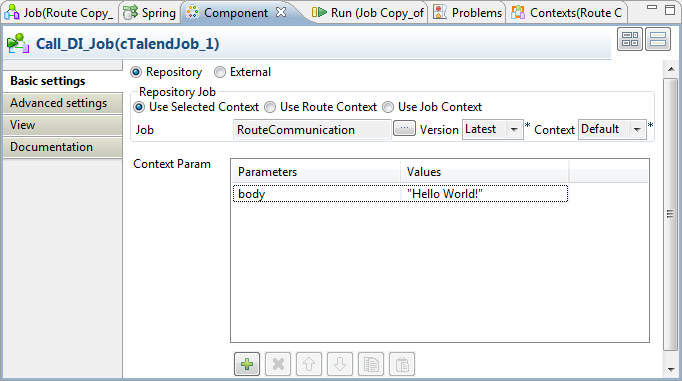
-
Select Repository to call a Job from
the repository. -
In the Repository Job area, select
Use Selected Context.Click […] next to the Job field to open the [Assign
Job] wizard. Select Assign an
existing Job to this cTalendJob component and click
Next.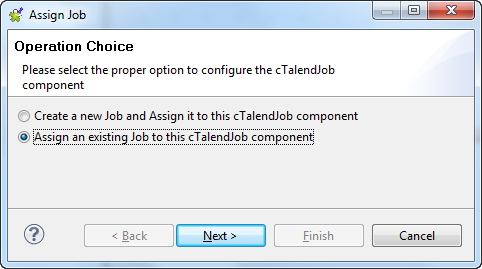
In the Job selection view, select
RouteCommunicationthat we just created in the
Job designs tree view and click
Finish.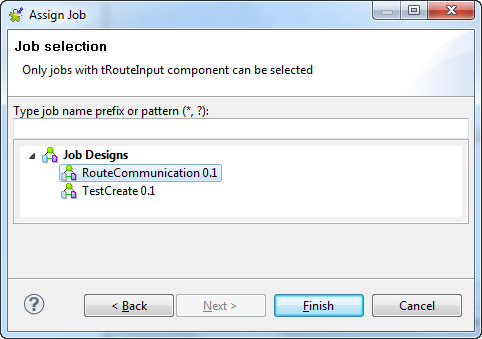
RouteCommunicationis now displayed in the Job field. By default, the latest version and
the default context of it is selected. -
Click [+] under the Context Param to add a row to it.
The Parameters list contains the
variables in the default context group of the referenced Job. Select
bodyin the list.Enter
"Hello World!"in the Values field. It will replace the value
worldthat is defined in the Job context. -
Click the Advanced settings view.
Select the Propagate Header check box
to pass the header that is defined in cSetHeader to the Job as a context variable.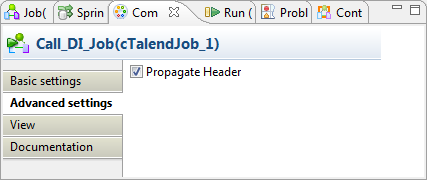
-
Press Ctrl+S to save your
Route.
-
Click the Code tab at the bottom of the
design workspace to check the generated code.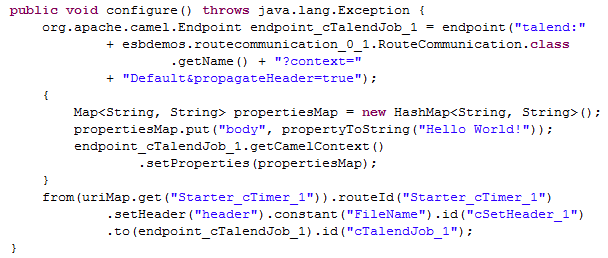
As shown above, a message route is built from the
Starter,
set a messageheaderby thecSetHeader, and then
sent tocTalendJobfor the execution of the Job. -
Press F6 to execute the Route.
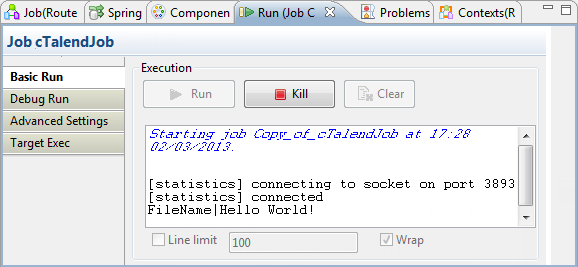
As shown above, the header and body of the message is printed in the
execution console by the tLogRow. The
header value isFileName. It is defined by the cSetHeader and passed to the Job as a context
variable. The body value isHello World!. It is defined by
tRouteInput using the context variable
bodyof the Job. The value for this variable is set as
worldin the Job, but changed toHello World!
in cTalendJob.