Configuring tPigLoad
-
Double-click tPigLoad to open its
Component view.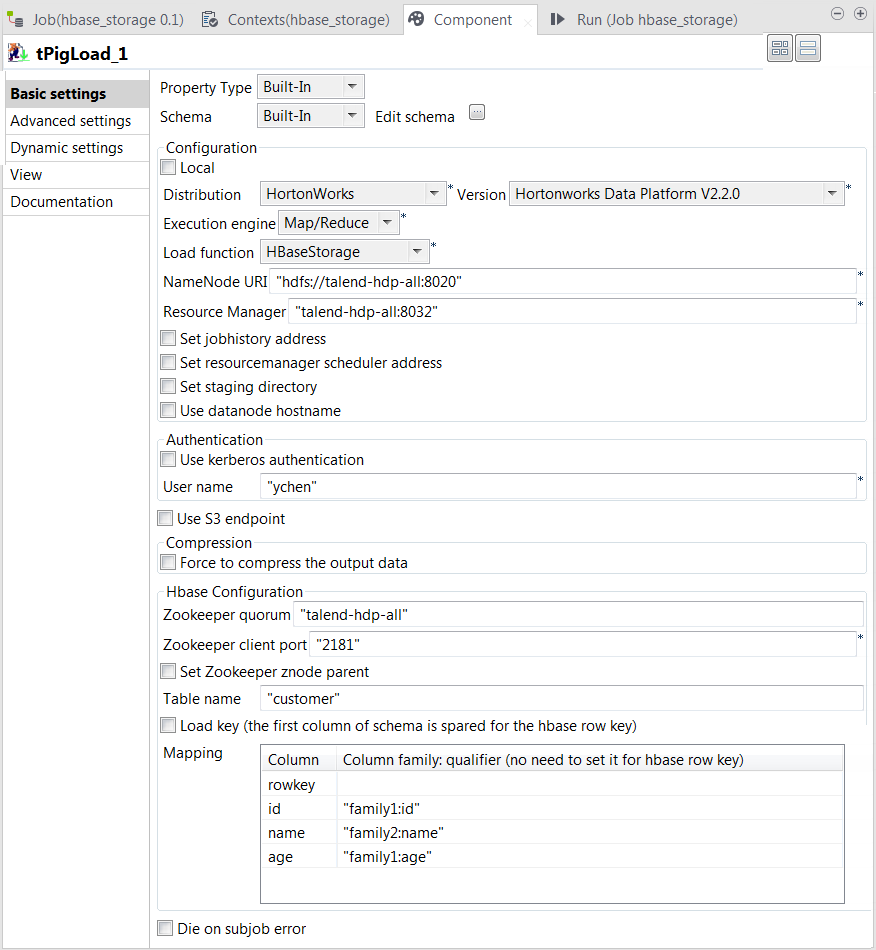
-
Click the

button next to Edit
schema to open the schema editor. -
Click the

button four times to add four rows and rename them:
rowkey, id, name and age. The rowkey column put at the top of the schema to store the
HBase row key column, but in practice, if you do not need to load the row
key column, you can create only the other three columns in your
schema.
-
Click OK to validate these changes and
accept the propagation prompted by the pop-up dialog box. -
In the Mode area, select Map/Reduce, as we are using a remote Hadoop
distribution. -
In the Distribution and the Version fields, select the Hadoop distribution
you are using. In this example, we are using HortonWorks Data Platform V1. -
In the Load function field, select
HBaseStorage. Then, the corresponding
parameters to set appear. -
In the NameNode URI and
the Resource Manager fields, enter the
locations of those services, respectively. If you are using WebHDFS, the location should be
webhdfs://masternode:portnumber; if this WebHDFS is secured
with SSL, the scheme should be swebhdfs and you need to use
a tLibraryLoad in the Job to load the library required by
the secured WebHDFS. -
In the Zookeeper quorum and the Zookeeper client port fields, enter the location
information of the Zookeeper service to be used. -
If the Zookeeper znode parent location has been defined in the Hadoop
cluster you are connecting to, you need to select the Set zookeeper znode parent check box and enter the value of
this property in the field that is displayed. -
In the Table name field, enter the name
of the table from which tPigLoad reads the
data. -
Select the Load key check box if you need
to load the HBase row key column. In this example, we select it. -
In the Mapping table, four rows have been
added automatically. In the Column
family:qualifier column, enter the HBase columns you need to
map with the schema columns you defined. In this scenario, we put family1:id for the id column, family2:name
for the name column and family1:age for the age column.
Document get from Talend https://help.talend.com
Thank you for watching.
Subscribe
Login
0 Comments