tS3Put
tS3Put Standard properties
These properties are used to configure tS3Put running in the Standard Job framework.
The Standard
tS3Put component belongs to the Cloud family.
The component in this framework is generally available.
Basic settings
|
Use existing connection |
Select this check box and in the Component |
|
Access Key |
The Access Key ID that uniquely identifies an AWS Account. For how to |
|
Secret Key |
The Secret Access Key, constituting the security credentials in To enter the secret key, click the […] button next to |
|
Inherit credentials from AWS role |
Select this check box to obtain AWS security credentials from Amazon EC2 |
|
Assume role |
Select this check box and specify the values for the following parameters used to
create a new assumed role session.
For more information about assuming roles, see AssumeRole. |
|
Region |
Specify the AWS region by selecting a region name from the list or entering |
|
Encrypt |
Select this check box and from the Key
type drop-down list displayed, select one of the following three options for encrypting the data on the client-side before sending to Amazon S3. For more information, see Protecting Data Using Client-Side Encryption.
|
|
Bucket |
Name of the bucket, namely the top level folder, on the S3 |
|
Key |
Name of the file to be saved on the S3 server. |
|
File |
Name of the local file to be uploaded to the S3 server. |
|
Server-Side Encryption |
Select this check box to enable server-side encryption to protect your For more information on server-side encryption with SSE-S3, see http://docs.aws.amazon.com/AmazonS3/latest/dev/UsingServerSideEncryption.html. |
|
Die on error |
This check box is cleared by default, meaning to skip the row on error |
Advanced settings
|
Config client |
Select this check box to configure client parameters.
Client parameter: select client
Value: enter the parameter Not available when Use existing |
|
STS Endpoint |
Select this check box and in the field displayed, specify the AWS Security Token This check box is available only when the Assume |
|
Part size (Mb) |
Specify the part size in MB when uploading a large file in parts. For |
|
tStatCatcher Statistics |
Select this check box to collect log data at the component |
Global Variables
|
Global Variables |
ERROR_MESSAGE: the error message generated by the A Flow variable functions during the execution of a component while an After variable To fill up a field or expression with a variable, press Ctrl + For further information about variables, see |
Usage
|
Usage rule |
This component can be used alone or with other S3 components, e.g. |
|
Dynamic settings |
Click the [+] button to add a Once a dynamic parameter is defined, the Component List box in the Basic For examples on using dynamic parameters, see Scenario: Reading data from databases through context-based dynamic connections and Scenario: Reading data from different MySQL databases using dynamically loaded connection parameters. For more information on Dynamic |
|
Limitation |
Due to license incompatibility, one or more JARs required to use this component are not |
Scenario: File exchanges with Amazon S3
In this scenario, tS3Put is used to send a file to
the Amazon S3 server while tS3Get is used to get that
file.
Linking the components
-
Drop tS3Connection, tS3Put and tS3Get onto the
workspace. - Link tS3Connection to tS3Put using the OnSubjobOk trigger.
-
Link tS3Put to tS3Get using the OnSubjobOk
trigger.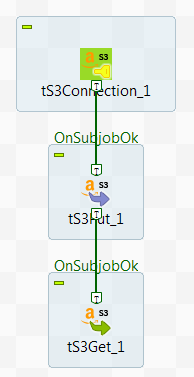
Configuring the components
-
Double-click tS3Connection to open its
Basic settings view.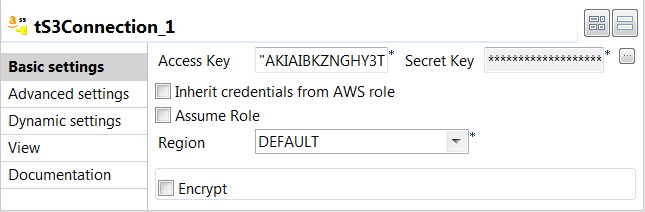
-
In the Access Key and Secret Key fields, enter the authentication
credentials. -
Double-click tS3Put to open its Basic settings view.
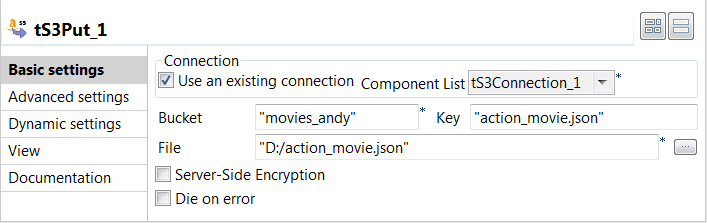
-
Select the Use existing connection check
box to reuse the connection. -
In the Bucket field, enter the bucket
name. -
In the Key field, enter the name of the
file to be saved on the S3 server. -
In the File field, enter the file to be
uploaded to the S3 server. -
Double-click tS3Get to open its Basic settings view.
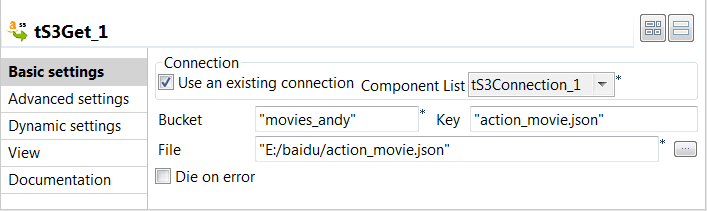
-
Select the Use existing connection check
box to reuse the connection. -
In the Bucket field, enter the bucket
name. -
In the Key field, enter the name of the
file to be retrieved from the S3 server. -
In the File field, enter the local name
of the retrieved file.
Executing the Job
- Press Ctrl + S to save the Job.
-
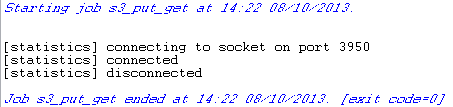
Press F6 to run the Job.
-
Go to the S3 web console:
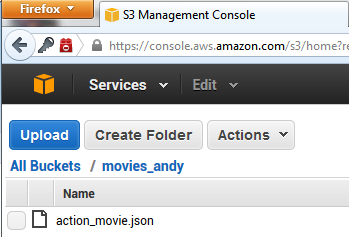 As shown above, the file has been put on to the S3 server.
 -
Refresh the S3 Browser client:
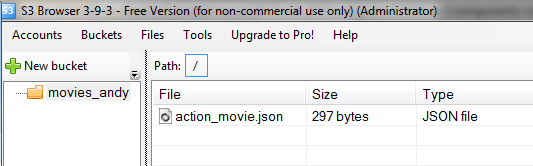 This shows that the S3 Put action was performed successfully.
 -
Go to the folder where the retrieved file is saved locally:
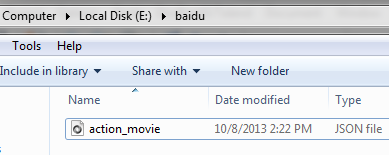 As shown above, the remote file is retrieved to the local disk, proof that
the S3 Get action was performed successfully.