Inserting a column and altering data using tMysqlOutput
This Java scenario is a three-component job that aims at creating random data using a
tRowGenerator, duplicating a column to be altered
using the tMap component, and eventually altering the
data to be inserted based on an SQL expression using the tMysqlOutput component.
-
Drop the following components from the Palette onto the design workspace: tRowGenerator, tMap and
tMySQLOutput. -
Connect tRowGenerator, tMap, and tMysqlOutput using
the Row Main link.

-
In the design workspace, select tRowGenerator to display its Basic
settings view.

-
Click the Edit schema three-dot button to
define the data to pass on to the tMap
component, two columns in this scenario, name and
random_date.

-
Click OK to close the dialog box.
-
Click the RowGenerator Editor three-dot
button to open the editor and define the data to be generated.

-
Click in the corresponding Functions fields
and select a function for each of the two columns,getFirstNamefor
the first column andgetrandomDatefor the second column. -
In the Number of Rows for Rowgenerator
field, enter 10 to generate ten first name rows and click Ok to close the editor. -
Double-click the tMap component to open the
Map editor. The Map editor opens displaying the input metadata of the tRowGenerator component.

-
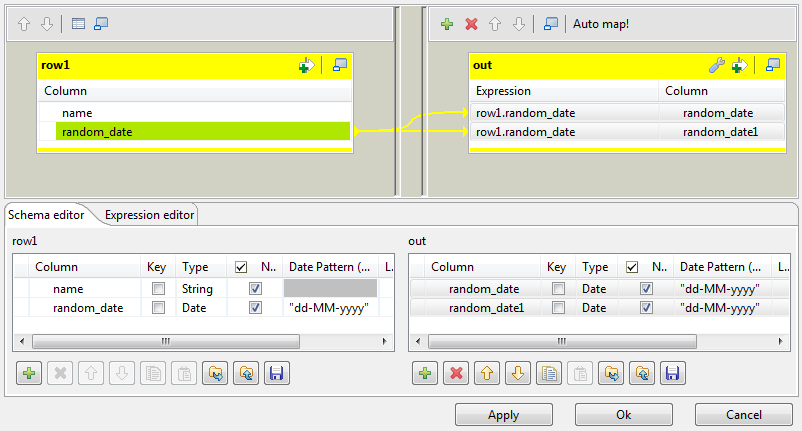
In the Schema editor panel of the Map
editor, click the plus button of the output table to add two rows and define the
first as random_date and the second as
random_date1.

In this scenario, we want to duplicate the random_date column and
adapt the schema in order to alter the data in the output component.
-
In the Map editor, drag the random_date row from the
input table to the random_date and random_date1
rows in the output table.
-
Click OK to close the editor.
-
In the design workspace, double-click the tMysqlOutput component to display its Basic settings view and set its parameters.

-
Set Property Type to Repository and then click the three-dot button to open the
Repository content dialog box and select
the correct DB connection. The connection details display automatically in the
corresponding fields.Note:If you have not stored the DB connection details in the Metadata entry in the Repository, select Built-in
on the property type list and set the connection detail manually. -
Click the three-dot button next to the Table
field and select the table to be altered, Dates in this
scenario. -
On the Action on table list, select
Drop table if exists and create, select
Insert on the Action on
data list. -
If needed, click Sync columns to synchronize
with the columns coming from the tMap
component. -
Click the Advanced settings tab to display
the corresponding view and set the advanced parameters.

-
In the Additional Columns area, set the
alteration to be performed on columns.In this scenario, the One_month_later column replaces
random_date_1. Also, the data itself gets altered using
an SQL expression that adds one month to the randomly picked-up date of the
random_date_1 column. ex: 2007-08-12 becomes
2007-09-12.-Enter One_Month_Later in the Name cell.
-In the SQL expression cell, enter the
relevant addition script to be performed,"adddate(Random_date, interval 1in this scenario.
month)"-Select Replace on the Position list.
-Enter Random_date1 on the Reference column list.
For this job we duplicated the random_date_1 column in the DB
table before replacing one instance of it with the
One_Month_Later column. The aim of this workaround was to
be able to view upfront the modification performed.
-
Save your job and press F6 to execute
it.
The new One_month_later column replaces the
random_date1 column in the DB table and adds one month to each
of the randomly generated dates.
