tLogCatcher
Operates as a log function triggered by one of the three: Java
exception, tDie or tWarn, to collect and transfer log
data.
Both the tDie and tWarn
components are closely related to the tLogCatcher
component.They generally make sense when used alongside a tLogCatcher component in order for the log data collected to be encapsulated
and passed on to the output defined.
Fetches set fields and messages from Java Exception, tDie and/or tWarn and passes them on to the next component.
tLogCatcher Standard properties
These properties are used to configure tLogCatcher running in the Standard Job framework.
The Standard
tLogCatcher component belongs to the Logs & Errors family.
The component in this framework is available in all Talend
products.
Basic settings
|
Schema and Edit |
A schema is a row description, it defines the fields to be processed The schema of this component is read-only. It describes the properties
|
|
Catch Java Exception |
Select this check box to trigger the tCatch function when a Java Exception occurs in the |
|
Catch tDie |
Select this check box to trigger the tCatch function when a tDie component is called in a Job. |
|
Catch tWarn |
Select this check box to trigger the tCatch function when a tWarn component is called in a Job. |
Global Variables
|
Global Variables |
ERROR_MESSAGE: the error message generated by the A Flow variable functions during the execution of a component while an After variable To fill up a field or expression with a variable, press Ctrl + For further information about variables, see |
Usage
|
Usage rule |
This component is usually used as the start component of a secondary |
Catching messages triggered by a tWarn component
Creating a Job for catching messages triggered by a tWarn component
Create a Job to trigger some messages using the tWarn component, then catch the messages using the tLogCatcher component and display the messages on the
console.

-
Create a new Job and add a tRowGenerator component, a tWarn
component, a tLogCatcher component, and a tLogRow component by typing their names in the design
workspace or dropping them from the Palette. -
Link the tRowGenerator component to
the tWarn component using a Row > Main connection. -
Link the tLogCatcher component to the
tLogRow component using a Row > Main connection.
Configuring the Job for catching messages triggered by the tWarn component
messages triggered by the tWarn component and
then displays the messages on the console.
-
Double-click the tRowGenerator
component to open its row generator editor.
- Define the schema by adding one column id of Integer type, and select the predefined function Numeric.sequence(String,int,int) in the Functions column.
- Enter the number of records to be generated in the Number of Rows for RowGenerator field, 3 in this example. When done, click OK to close the dialog box.
-
Double-click the tWarn component to
open its Basic settings view.
- Select Info from the Priority drop-down list.
-
In the Warn message field, enter the
message to be triggered when a new record is generated, a
new record is generated in this example. -
Double-click the tLogCatcher component
to open its Basic settings view.
-
Select the Catch tWarn check box to
catch the messages triggered by the tWarn
component. -
Double-click the tLogRow component to
open its Basic settings view, and then select
Table (print values in cells of a table) in the
Mode area for better readability of the
result.
Executing the Job to catch messages triggered by a tWarn component
the Job for catching messages triggered by the tWarn component, you can then execute the Job and verify the Job execution
result.
- Press Ctrl + S to save the Job.
-
Press F6 to execute the Job.
 As shown above, all messages triggered are collected and displayed on the
console.
Catching the message triggered by a tDie component
Creating a Job for catching the message triggered by a tDie component
Create a Job to trigger a message using the tDie component, then catch the message using the tLogCatcher component and display the message on the console.

-
Create a new Job and add a tRowGenerator component, a tFileOutputDelimited component, a tDie component, a tJava component,
a tLogCatcher component, and a tLogRow component by typing their names in the design
workspace or dropping them from the Palette. -
Link the tRowGenerator component to
the tFileOutputDelimited component using a
Row > Main
connection. -
Link the tFileOutputDelimited
component to the tDie component using a Trigger > Run if
connection. -
Link the tRowGenerator component to
the tJava component using a Trigger > On Subjob Ok
connection. -
Link the tLogCatcher component to the
tLogRow component using a Row > Main connection.
Configuring the Job for catching the message triggered by the tDie component
triggered by the tDie component and then displays
the message on the console.
-
Double-click the tRowGenerator
component to open its row generator editor.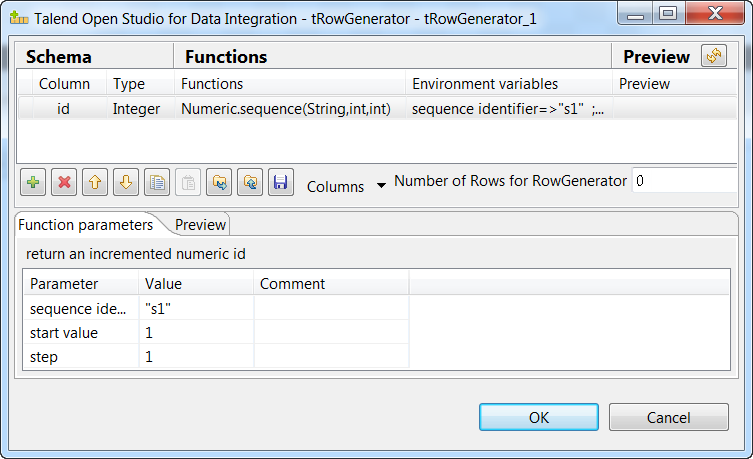
- Define the schema by adding one column id of Integer type, and select the predefined function Numeric.sequence(String,int,int) in the Functions column.
- Enter the number of rows to be generated in the Number of Rows for RowGenerator field, 0 in this example. When done, click OK to close the dialog box.
-
Double-click the tFileOutputDelimited
component to open its Basic settings view, and in
the File Name field, specify the path to the file
that will hold the data to be generated. -
Click the If connection, and in the
Condition field on the Basic settings view, specify the condition based on which the
tDie component will be triggered. In this
example, it is ((Integer)globalMap.get(“tRowGenerator_1_NB_LINE”)) <=0, which
means the tDie component will be triggered when the
number of rows to be generated is less than or equal to zero. -
Double-click the tDie component to
open its Basic settings view, and in the Die message field, enter the message to be triggered
before the Job is killed. In this example, it is no row
generated.
-
Double-click the tJava component to
open its Basic settings view, and in the Code field, enter1System.out.println("The number of rows generated is " + ((Integer)globalMap.get("tRowGenerator_1_NB_LINE")) + ". #This message will not be displayed if no row is generated.");Note that this message will be displayed only when the number of rows generated is
greater than zero. In this example, the number of rows to be generated is 0, so the Job will be killed and this message will not
be displayed. -
Double-click the tLogCatcher component
to open its Basic settings view and select the
Catch tDie check box to catch the message
triggered by the tDie component.
-
Double-click the tLogRow component to
open its Basic settings view, and then select
Table (print values in cells of a table) in the
Mode area for better readability of the
result.
Executing the Job to catch the message triggered by the tDie component
the Job for catching the message triggered by the tDie component, you can then execute the Job and verify the Job execution
result.
- Press Ctrl + S to save the Job.
-
Press F6 to execute the Job.
 As shown above, the message triggered is collected and displayed on the
console. -
Change the number of rows to be generated (10 for example) in the Number of Rows for
RowGenerator field of the tRowGenerator component, save and execute the Job again to find a
different result.