Reading, transforming, and writing data in NetSuite
-
Double-click the first tNetsuiteInput to open its Basic
settings view.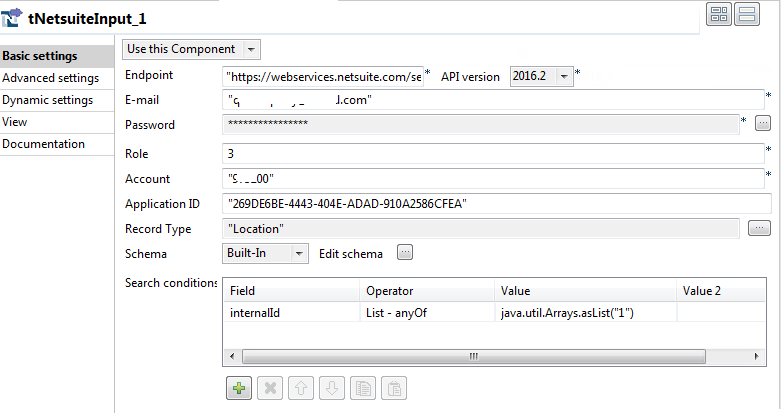
-
In the Endpoint,
API version, E-mail, Password,
Role, Account, and Application ID fields,
enter the information required to access NetSuite. -
Click the […] button next to the Record Type field, and from the dialog box that
opens select Location to read the
location type information from NetSuite.The schema corresponding to the location record type is automatically
retrieved. -
Define a search condition.
-
Click the [+] button below the
Search conditions table to
add one row. -
Click the cell of the Field
column and select internalId from
the drop-down list. -
Click the cell of the Operator
column and select List – Any Of
from the drop-down list. -
In the cell of the Value column,
enter java.util.Arrays.asList(“1”) to retrieve
only the record whose internalId
is set to 1.
-
Click the [+] button below the
-
Connect the first tNetsuiteInput to tMap
using a Row > Main connection. -
Double-click tNetsuiteOutput to open its Basic
settings view.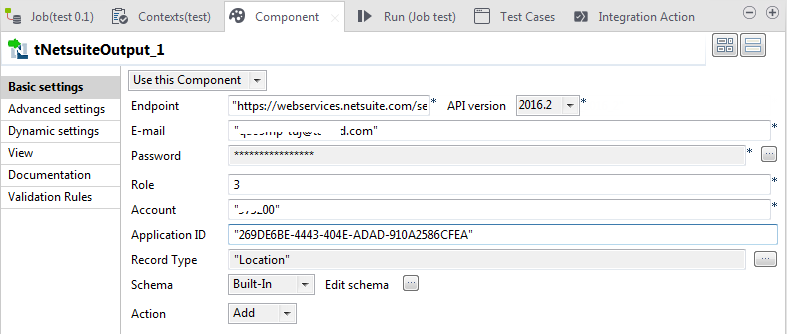
-
In the Endpoint,
API version, E-mail, Password,
Role, Account, and Application ID fields,
enter the information required to access NetSuite. -
In the Action list, select insert to insert the transformed data into
NetSuite. -
Click the […] button next to the Record Type field, and in the dialog box that
opens select Location to write the
location type information into NetSuite. -
Click the […] button
next to Edit schema to open the schema
editor. You can see the schema has already been prefilled. Keep only the columns
that are relevant to your operation and delete others. In this example, keep the
column Name, Parent, IncludeChildren, IsInactive, TranPrefix, Logo, MakeInventoryAvailable, MakeInventoryAvailableStore, CustomFieldList,
and ExternalId.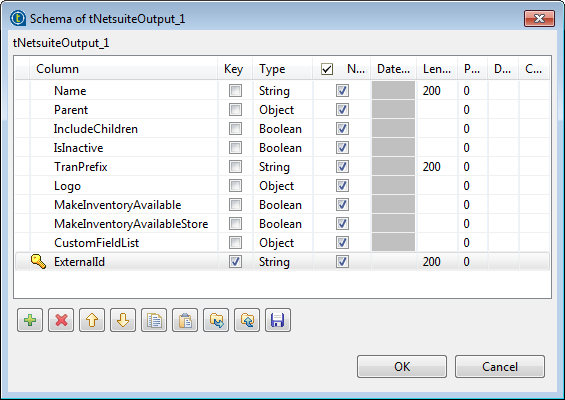
-
Connect tMap to
tNetsuiteOutput using a Row > *New Output*
(Main) connection. In the pop-up dialog box, enter the name of
the output connection, out in this example. Then click
Yes to let tMap get the schema of the target component tNetsuiteOutput. -
Double-click tMap to
open its Map Editor and configure data
flow mappings.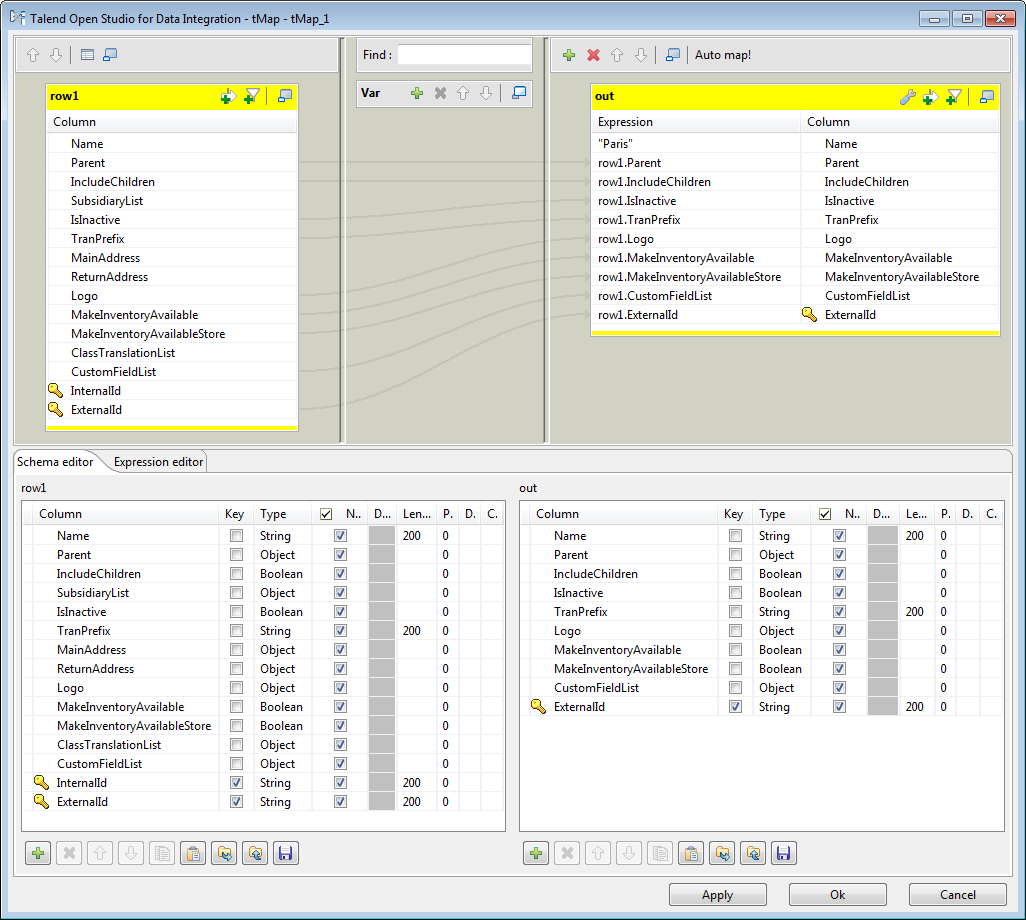
-
In the out output table, set the value of the
Name column by entering “Paris” in the corresponding Expression column field. -
Drag and drop the Parent column in the row1 input table onto the Expression column of the corresponding
row in the out output table. -
Do the same to drag and drop other columns IncludeChildren, IsInactive, TranPrefix, Logo, MakeInventoryAvailable, MakeInventoryAvailableStore, CustomFieldList, and ExternalId in the
row1 input table onto the Expression column of the corresponding
row in the out output table.
-
In the out output table, set the value of the
Document get from Talend https://help.talend.com
Thank you for watching.
Subscribe
Login
0 Comments