|
Component Family |
Processor |
|
|
Function |
The cDelayer component delays the |
|
|
Purpose |
The cDelayer component allows you |
|
|
Basic settings |
Time to wait (in ms) |
Fill this field with an integer (in milliseconds) to define the |
|
Usage |
This component is usually used in the middle of a Route. |
|
|
Limitation |
n/a |
|
In this scenario, a cDelayer component is used to delay the
routing of each message to the target endpoint by 20 seconds.
This use case requires one cDelayer component,
two cFile components, and two cProcessor components.
-
From the Messaging folder of the
Palette, drop two cFile components onto the design workspace, one to read
files from a local folder and the other to write the files to another local
folder. -
From the Processor folder of the
Palette, drop two cProcessor components onto the design workspace, one next to
the reading component to monitor messages read from the source file folder,
and the other next to the writing component to monitor messages written to
the target file folder. -
From the Processor folder of the Palette, drop one cDelayer
component onto the design workspace, between the message reading monitor
component and the message writing component. -
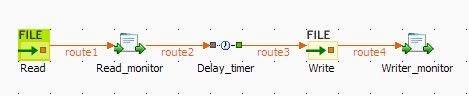
Connect the components using Row >
Route connections. -
Label the components to better identify their roles in the Route, as shown
above.
-
Double-click the first cFile component,
which is labelled Read, to open its
Basic settings view in the Component tab.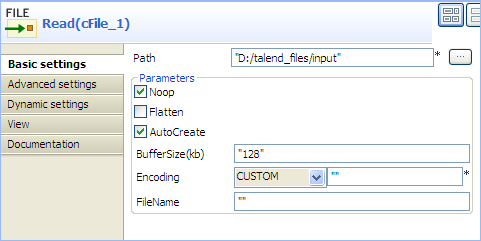
-
In the Path field, enter or browse to the
path to the source files, and leave the other parameters as they are. -
Repeat these steps to define the target folder in property settings of the second
cFile component, which is labelled
Write. -
Double-click the first cProcessor
component, which is labelled Read_monitor, to open its Basics
settings view in the Component tab.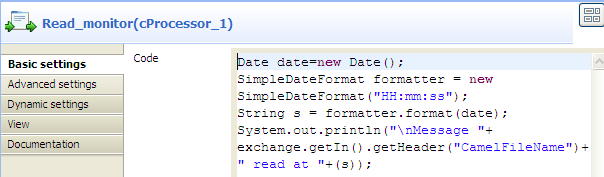
-
In the Code area, customize the code to display the time
each message is read from the source:1234567Date date=new Date();SimpleDateFormat formatter = new SimpleDateFormat("HH:mm:ss");String s = formatter.format(date);System.out.println("Message "+exchange.getIn().getHeader("CamelFileName")+" read at "+(s)); -
Repeat these steps to configure the second cProcessor
component, which is labelled Write_monitor, to display the time each message is written
to the target:12345Date date=new Date();SimpleDateFormat formatter = new SimpleDateFormat("HH:mm:ss");String s = formatter.format(date);System.out.println("Message "+exchange.getIn().getHeader("CamelFileName")+ " written at "+(s)); -
Double-click the cDelayer component,
which is labelled Delay_timer, to open
its Basic settings view in the Component tab.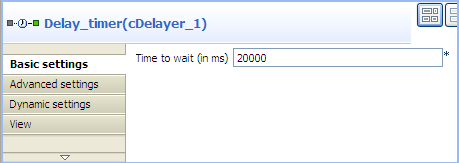
-
In the Time to wait (in ms) field, enter
the number of milliseconds by which you want to delay message delivery. Note
that the value must be a positive integer.In this use case, we want each message to be delivered after a 20-second delay.
-
Press Ctrl+S to save your Route.
-
Click the Code tab at the
bottom of the design workspace to have a look at the generated code.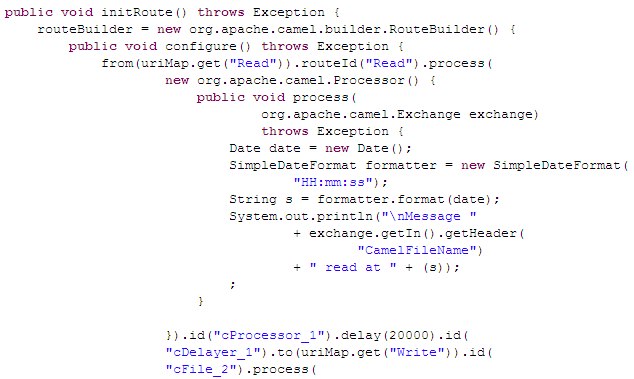
As shown in the code, a 20-second delay is implemented according to
.delay(20000)in the message routingfromthe
Readendpoint.totheWrite
endpoint. -
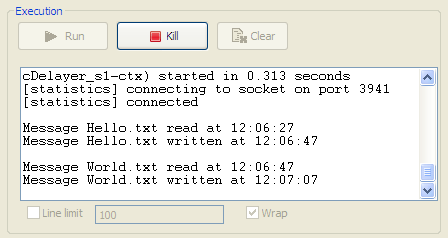
Press F6 to execute the Route.
RESULT: Each message read from the source folder is routed to the target folder after a
20-second delay.