Warning
This component will be available in the Palette of
Talend Studio on the condition that you have subscribed
to one of the Talend platform solutions.
|
Component Family |
Transformation |
|
|
Function |
cMap transforms data from a wide range of sources to a |
|
|
Purpose |
cMap executes transformations |
|
|
Basic settings |
Open Map Editor |
Click the […] button to open |
| Map Path |
Specifies the map to be executed. Click the […] button next to |
|
|
Log Level |
From the drop-down list, select how often you want events to be
|
|
|
Exception Threshold |
Talend Data Mapper returns an execution From the drop-down list, select the severity level at which an
|
|
|
Output Type |
From the drop-down list, select how you want the output to be
|
|
|
Usage |
cMap is used for Routes that |
|
|
Limitation |
Due to the license incompatibility, one or more JAR files required to use this component are This limitation applies to maps that reference databases. |
|
Note
For further information about performing transformations using Talend Data Mapper, see Talend Data Mapper User
Guide.
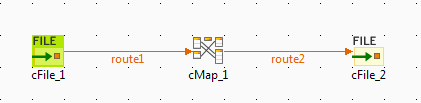
The following scenario creates a three-component Route, in which a cFile component visits a local file directory to copy its
contents, performs a transformation using a cMap
component, and then sends the files in the input directory to an output cFile component that writes the files in another
directory.
Copying an editable version of the example files
-
In the Mapping perspective, in
the Data Mapper view, expand the Hierarchical Mapper node and the Other Projects folder, right-click Examples and then select Copy in the contextual menu. -
In the Data Mapper view, right-click at the
root of the Hierarchical Mapper node, and then
select Paste in the contextual menu.This copies an editable version of all the read-only example files to your
local workspace.
Adding and linking the components
-
Click the point in the design workspace where you want to add the first
component, start typing cFile, and then click
the name of the component when it appears in the list proposed in order to
select it. -
Do the same to add a cMap component and a
second cFile component as well. -
Connect the cFile_1 component to the
cMap component using a Row > Route link, then connect the cMap component to the cFile_2 component using a second Row >
Route link.
Defining the properties of cFile_1
-
Select the cFile_1 component to define its
properties.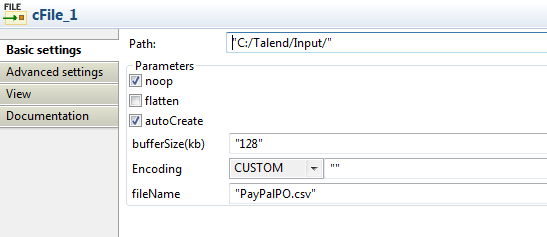
-
In the Path field, browse to or enter the
path to where the input file is located. -
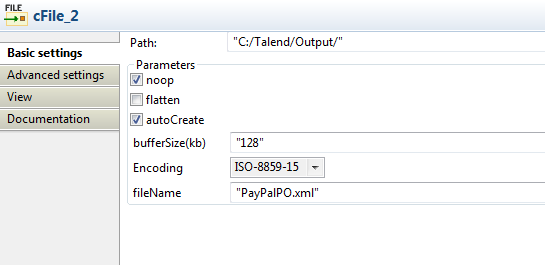
In the fileName field, enter the name of the
input file: PayPalPO.csv in this
example. -
Leave the other parameters unchanged.
Defining the properties of cMap
-
Select the cMap component to define its
properties.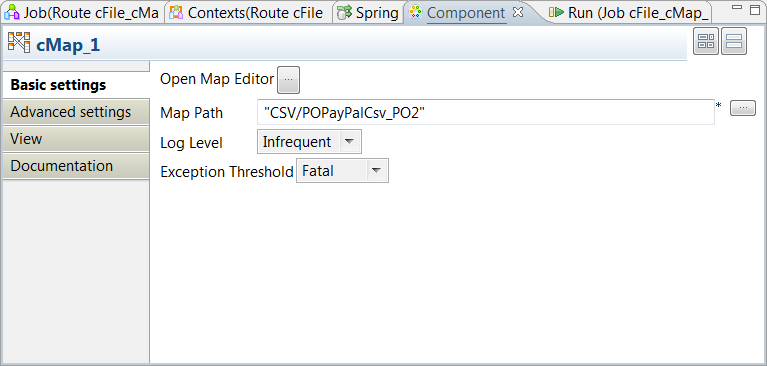
-
Click the […] button next to the Map Path field to open the picker and select the map
to use, Maps/CSV/POPayPalCsv_PO2, then click
OK. This map transforms a CSV file into an
XML file.