cIntercept
modifying the original one. When this detour is complete, message routing to the originally
intended target endpoints continues. This can be useful at testing time to simulate error
handling.
cIntercept Standard properties
These properties are used to configure cIntercept running in the Standard Job framework.
The Standard
cIntercept component belongs to the Exception Handling family.
Usage
|
Usage rule |
cIntercept is a start component of a sub-route. |
|
Connections |
Row / Route: Select the |
|
|
Trigger / When: Select the In the Type list, select the type of language you will In the Condition field, type in the condition that will All the messages that do not match this condition are dropped by default or can |
|
Limitation |
To keep the original sub-routes untouched, cIntercept only be used in a separate sub-route |
Intercepting several routes and redirect them in a single new route
This scenario applies only to Talend Open Studio for ESB, Talend Data Services Platform and Talend Data Fabric.
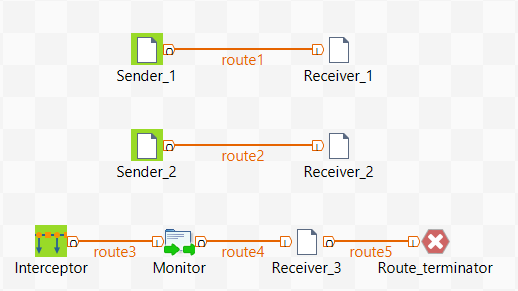
In this scenario, messages on two sub-routes are intercepted and routed along a new
sub-route, which is then terminated before the original sub-routes continue.
Dropping and linking the components
This scenario requires five cFile components, one
cIntercept component, one cProcessor component, and one cStop
component.
- From the Connectivity folder of the Palette, drop four cFile components onto the design workspace.
-
Connect the two pairs of cFile components
using Row > Route connections. Messages on these two sub-routes will be
intercepted. -
From the Exception Handling folder, drop a cIntercept component onto the design
workspace. - From the Custom folder, drop a cProcessor component onto the design workspace.
- From the Connectivity folder, drop a fifth cFile component onto the design workspace.
-
From the Miscellaneous folder, drop a
cStop component onto the design
workspace. -
Connect these four components one to the next using Row > Route connections.
Along this sub-route, intercepted messages will be directed to a new
endpoint before the entire Route is terminated. - Label the components to better identify their roles in the Route.
Configuring the components and connections
In this scenario, the cIntercept component intercepts all
the messages on all the sub-routes as soon as the messages are sent and does not
have properties to set. The cStop component stops
the sub-route on which it is dropped before it completes and does not have
properties to set. Therefore, you only need to configure the messaging endpoints and
monitor components.
-
Double-click the cFile component labeled
Sender_1 to display its Basic settings view in the Component tab.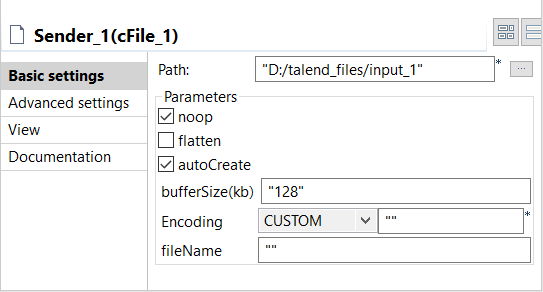
-
In the Path field, specify the file path
to the first source your are going to send messages from, and leave the
other parameters as they are. -
Double-click the cFile component labeled
Receiver_1 to display its Basic settings view in the Component tab.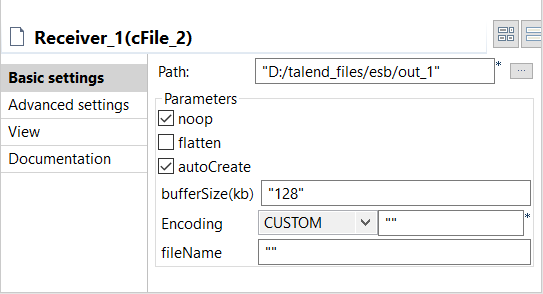
-
In the Path field, specify the file path
to the first destination you are going to send messages to, and leave the
other parameters as they are. -
In the same way, set the cFile components
labeled Sender_2 and Receiver_2 across the second sub-route. -
Double-click the cProcessor component,
which is labeled Monitor, to display its
Basic settings view in the Component tab, and customize the code in the
Code area to display the file names of
the messages intercepted on the console:12System.out.println("Message intercepted: "+exchange.getIn().getHeader("CamelFileName")); -
Double-click the cFile component labeled
Receiver_3 to display its Basic settings view in the Component tab.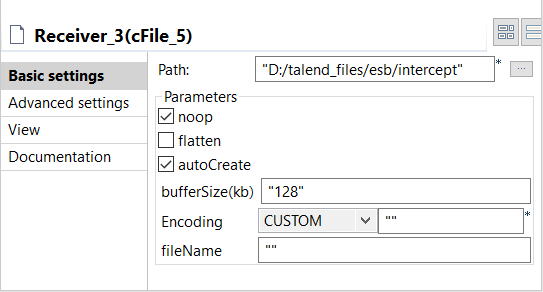
-
In the Path field, specify the file path
to the destination for the intercepted messages, and leave the other
parameters as they are. - Press Ctrl+S to save your Route.
Viewing code and executing the Route
-
Click the Code tab at the bottom of the
design workspace to have a look at the generated code. As shown in this piece of code, Interceptor intercepts
all messages on route, the intercepted messages are directed
.tothe endpoint Receiver_3, and cStop_1
terminates message routing before the messages are routedfrom
the endpoint Sender_1
.tothe endpoint Receiver_1
andfromthe endpoint Sender_2
.tothe endpoint Receiver_2. -
Click the Run view and click the
Run button to launch the execution of
your Route. You can also press F6 to
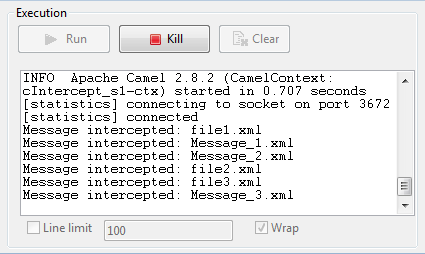
execute it.RESULT: Files are sent from the endpoints, caught by the cIntercept component, monitored by the cProcessor component and sent to a new endpoint, and then
the original sub-routes are terminated before they can continue.