cSEDA
Produces and consumes messages asynchronously in different threads within a single
CamelContext.
cSEDA provides asynchronous SEDA
behavior, so that messages are exchanged on a BlockingQueue and
consumers are invoked in a separate thread from the producer within
a single CamelContext.
cSEDA Standard properties
These properties are used to configure cSEDA running in the Standard Job framework.
The Standard
cSEDA component belongs to the Core family.
Basic settings
| When using as a start component in a Route: |
|
|
Name |
Type in any string that uniquely identifies the endpoint. |
| Specify maximum capacity size | Select this check box to set the maximum number of messages that the SEDA queue can hold. Specify the number in the Size field. |
|
Concurrent consumers |
Specify the number of concurrent threads processing exchanges. |
|
Wait for task to complete |
Specify whether the caller should wait for the asynchronous task |
| Timeout | Specify the time in milliseconds before a SEDA producer will stop waiting for an asynchronous task to complete. You can disable this option by using 0 or a negative value. |
|
Use multiple consumers |
Specifies whether multiple consumers are allowed. If enabled, you can use cSEDA for Publish-Subscribe messaging, which means you can send a message to the SEDA queue and have each consumer receive a copy of the message. When enabled, this option should be specified on every consumer endpoint. |
|
Limit concurrent consumers |
Whether to limit the number of concurrent consumers to the maximum of 500. By default, an exception will be thrown if a SEDA endpoint is configured with a greater number. |
|
Block when full |
Whether a thread that sends messages to a full SEDA queue will block until the queue’s capacity is no longer exhausted. By default, an exception will be thrown stating that the queue is full. By enabling this option, the calling thread will block instead and wait until the message can be accepted. |
| Poll timeout | Specify the timeout in milliseconds used when polling. When a timeout occurs, the consumer can check whether it is allowed to continue running. Setting a low value allows the consumer to react more quickly upon shutdown. |
| When using as a middle or end component in a Route: |
|
|
Use Exist cSEDA |
Click […] and select the corresponding consumer in the dialog box. |
Advanced settings
| Arguments | This option is available only when cSEDA is used as a start component in the Route. Set the optional arguments in the corresponding table. Click [+] as many times as required to add arguments to the table. Then click the corresponding Value field and enter a value. See the site http://camel.apache.org/seda.html for available options. |
Usage
|
Usage rule |
cSEDA is used as a start, middle, |
|
Limitation |
n/a |
Using cSEDA, cVM and cDirect to produce and consume messages
separately
This scenario applies only to Talend Open Studio for ESB, Talend Data Services Platform and Talend Data Fabric.
In this scenario, we will use a cTimer component to
trigger a message exchange. The message is routed to a cSEDA, a cVM and a cDirect sequentially with a message body set for each of
them, which is then consumed in another thread.
We will create a Route Resource to define the repeat count of the message exchange
(the number of times the message should be sent), which will be used by the cTimer component.
Creating a Route Resource and calling it in the Route
-
From the repository tree view, right-click the Resources node and select Create
Resource from the context menu.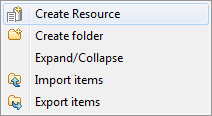
-
The New Route Resource wizard
opens. In the Name field, type in a
name for the Resource, for example, SetRepeatCount.
Click Finish to close the
wizard.
-
Enter
repeat.count=2in the design workspace to set the
repeat count.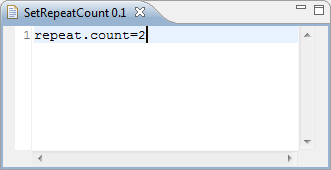
-
Press Ctrl+S to save your Route
Resource. -
Right-click the Route from the repository tree view and select
Manage Route Resources from the
context menu. The Manage Route Resources wizard
is opened.
-
Click Add and select
SetRepeatCount from the Resources tree view in
the dialog. Click OK. The SetRepeatCount Route Resource is added in the
table.
-
Click OK to close the wizard.
For more information about creating and using Route Resources, see
Talend Studio User Guide. -
Click the Spring tab on the lower
half of the design workspace of the Route.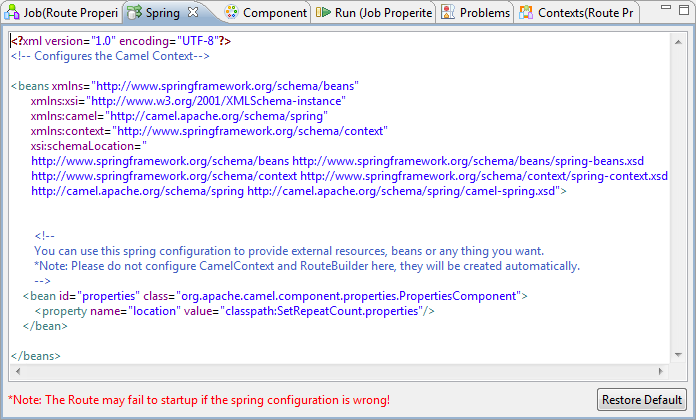
-
Enter the following code in this view to call the Route Resource you
just created.123<bean id="properties" class="org.apache.camel.component.properties.PropertiesComponent"><property name="location" value="classpath:SetRepeatCount.properties"/></bean>For more information about using Spring configuration in a Route, see
Talend Studio User Guide.
Dropping and linking the components

-
From the Palette, drag and drop a
cTimer, two cSEDA, two cVM, two
cDirect, three cSetbody, and three cLog
components onto the design workspace. -
Link the components using the Row >
Route connection as shown above. - Label the components to better identify their roles in the Route.
Configuring the components and connections
-
Double-click Starter in the design
workspace to display its Basic settings
view in the Component tab.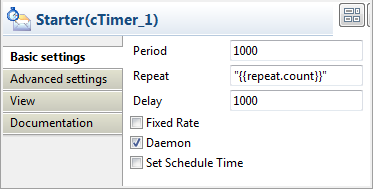
-
In the Repeat field, enter
"{{repeat.count}}"that is defined in the Route
resource. -
Double-click Set_body_SEDA in the
design workspace to display its Basic
settings view in the Component tab.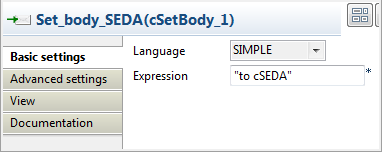
-
Select SIMPLE in the Language list.
In Expression field, enter the
"toas the message body.
cSEDA"Repeat this step to set the message body in Set_body_VM and Set_body_Direct as"to cVM"and"torespectively.
cDirect"Set_body_VM: Set_body_Direct:
-
Double-click SEDA_producer to display
its Basic settings view in the Component tab.
-
Click […] and select SEDA_consumer in the Select a Node: wizard, which will consume the message that
is sent to SEDA_producer.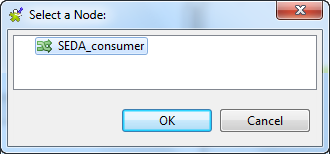 Repeat this step to select the node VM_consumer for VM_producer.
 Select the node Direct_consumer for
VM_producer.
-
Double-click SEDA_consumer to display
its Basic settings view in the Component tab.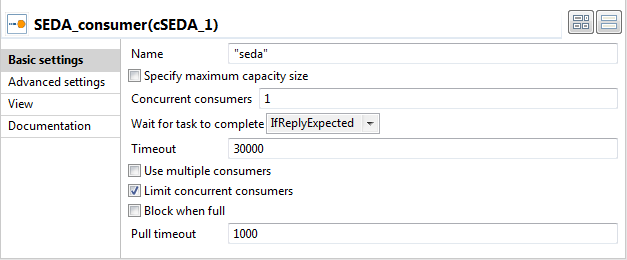
-
In the Name field, type in
"seda"to identify this endpoint. Keep the default settings
of the other options.Repeat this step to give the name"vm"to VM_consumer. Give the name
"direct"to Direct_consumer.
-
Double-click Monitor_SEDA to display
its Basic settings view in the Component tab.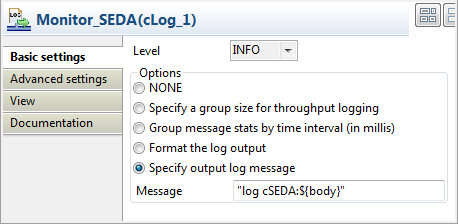
-
Select INFO in the Level list and select Specify output
log message. In the Message
field, enter"log cSEDA:${body}"to print the message body in
the console.Repeat this step to specify the output message for Monitor_VM and Monitor_Direct as"log cVM:${body}"and
"log cDirect:${body}"respectively. - Press Ctrl+S to save your Route.
Viewing code and executing the Route
-
Click the Code tab at the bottom of the
design workspace to have a look at the generated code.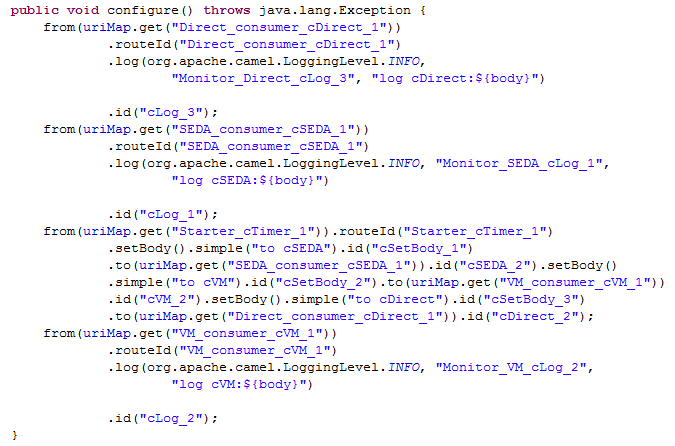 As shown in the code, a message route is built
from
"Starter_cTimer_1", set the message body"toby
cSEDA""cSetBody_1", and sent to
cSEDA_2, which is mapped to
"SEDA_consumer_cSEDA_1". The message is then sent to
cVM_2,cDirect_2sequentially which is mapped
to its corresponding consumer with a new message body. On the consumer side,
the message bodyfromeach consumer is logged by the
corresponding monitor. -
Click the Run view to display it and
click the Run button to launch the
execution of your Route. You can also press F6 to execute it. RESULT: The message that is sent to SEDA_producer, VM_producer, and Direct_producer is consumed by SEDA_consumer, VM_consumer, and Direct_consumer respectively. The message exchange is
triggered twice as set in the Route Resource
SetRepeatCount.