|
Component Family |
Processor |
|
|
Function |
cExchangePattern can be configured |
|
|
Purpose |
cExchangePattern allows you to set |
|
|
Basic settings |
Exchange Patterns |
Select the message exchange mode from InOnly or InOptionalOut, InOut, OutIn, |
|
Usage |
As a middle component in a Route, cExchangePattern allows you to set the message |
|
|
Limitation |
|
|
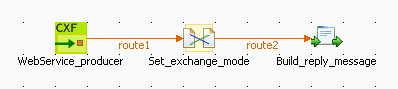
In this scenario, a cExchangePattern component is
used to enable the request/reply exchange pattern in the Route, so that the client can
get a reply from the server.
To send requests to the server side, a soapUI is needed and its configuration will be
briefed in the following contents.
To build the Route, do the following.
-
From the Processor folder of the Palette, drag and drop a cCXF, a cExchangePattern and a cProcessor onto the workspace, and label them WebService_producer, Set_exchange_mode and Build_reply_message respectively to better identify their roles in the Route.
-
Link cCXF to cExchangePattern using a Row > Route
connection. -
Link cExchangePattern to cProcessor using a Row > Route
connection.
-
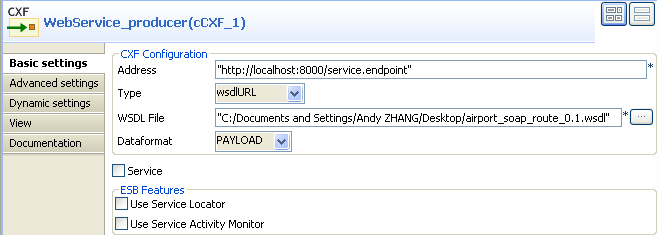
Double-click cCXF to open its Basic settings view in the Component tab.
-
In the Address field, leave the default
setting unchanged. -
In the Type list, select wsdlURL.
-
In the WSDL File field, enter the URL of
the wsdl file. You can also click the three-dot button to browse for
it. -
In the Dataformat list, select PAYLOAD.
-
Double-click cExchangePattern to open its
Basic settings view in the Component tab.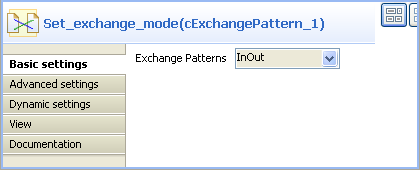
-
In the Exchange Patterns list, select
InOut to enable the request/reply
message exchange mode. -
Double-click cProcessor to open its
Basic settings view in the Component tab.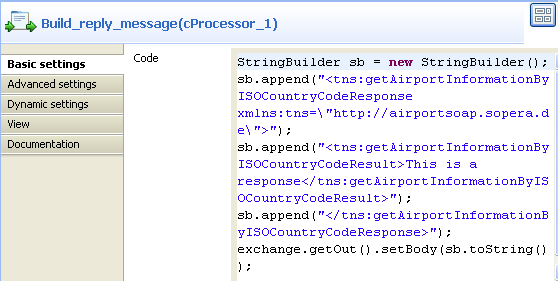
-
In the Code box, enter the code
below.12345StringBuilder sb = new StringBuilder();sb.append("<tns:getAirportInformationByISOCountryCodeResponse xmlns:tns="http://airportsoap.sopera.de">");sb.append("<tns:getAirportInformationByISOCountryCodeResult>This is a response</tns:getAirportInformationByISOCountryCodeResult>");sb.append("</tns:getAirportInformationByISOCountryCodeResponse>");exchange.getOut().setBody(sb.toString());As shown above, a string is built here and is used as a reply message of
the route. It is in line with the message definition of the above wsdl
file. -
Press Ctrl+S to save your Route.
-
Click the Code tab at the bottom of the
design workspace to check the generated code.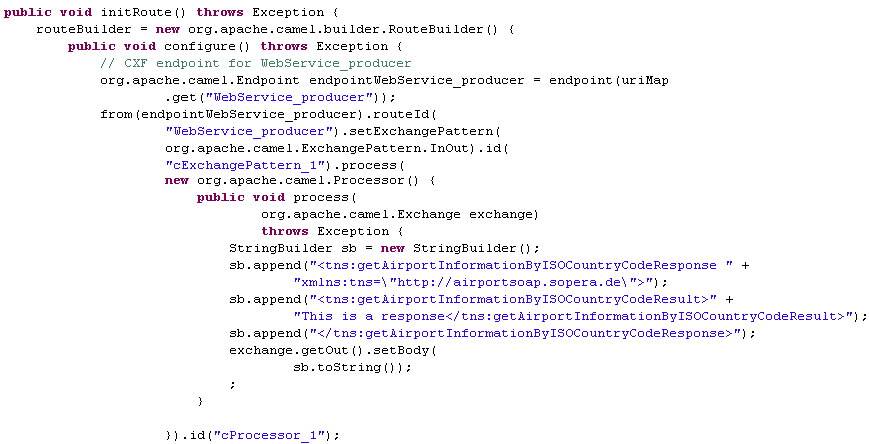
As shown above, the route has its message exchange pattern set as
InOutusing the method
.setExchangePattern(org.apache.camel.ExchangePattern.InOut).
In the meantime, a string is created usingStringBuilder sb = newat
StringBuilder()cProcessor_1and is used as the
reply message via the methodexchange.getOut().setBody(.
sb.toString()) -
Press F6 to execute the Route.
The server Route gets started.
-
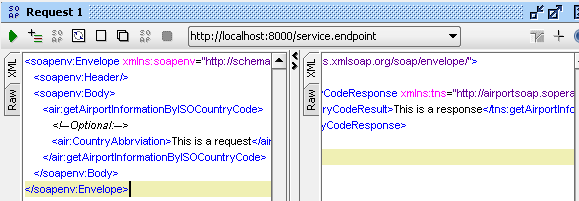
In the soapUI, create a Test project and edit a request, as illustrated
below: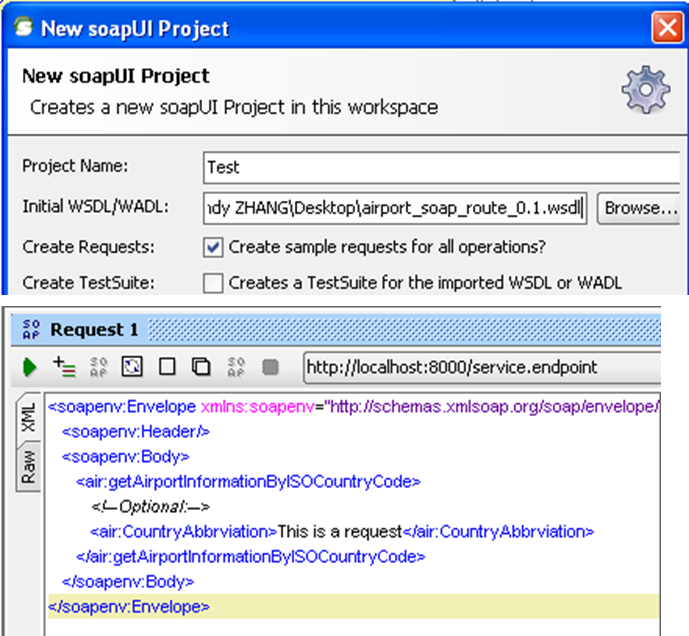
Note that the wsdl file must be same as that configured for cCXF, so that the request can be in line with the
definition of the web service. -
Send the request to the server Route and you can get the reply, as
illustrated below: